Background
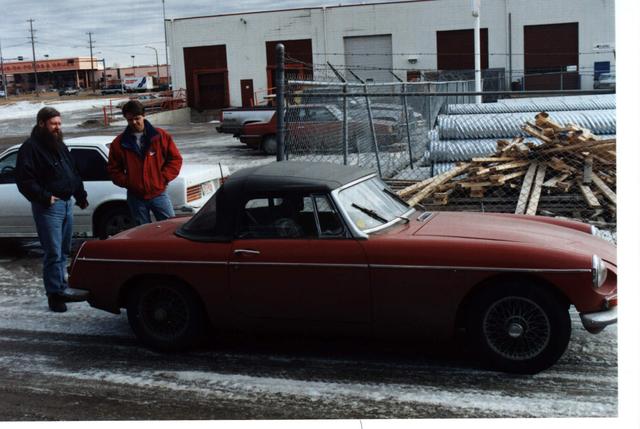
I bought my MGB back in 1983 for $3500. from a fellow in S.E. Calgary who said the car originally came from the West coast. At the time I bought the car, it was painted red. I drove the car on and off from 1983, doing small maintenance and storing it outside. In our second Calgary house, I stored it one winter on a gravel pad behind the house under a tarp. That was a nasty winter, and the tall grass from summer and high winter winds basically toasted the lower part of the body.
In the early 1990s, I drove the MGB up to Red Deer and it did not perform well at all. Inspection showed one of the lifter plates was loose, so my dad and I decided to check the engine over. Doing a compression test, instead of 150 psi across the board we saw 125, 120, 0, 120. The zero was not welcome. Pulling the head we found a huge hole in the piston. Although we had rebuilt many British engines in the past, we wisely opted this time to remove the engine, crate it up and send it to Miles in Edmonton for a professional rebuld job. Several monts and $2000 later, a new engine showed up on a skid in Red Deer. We installed the engine over a weekend and the car was better than ever!
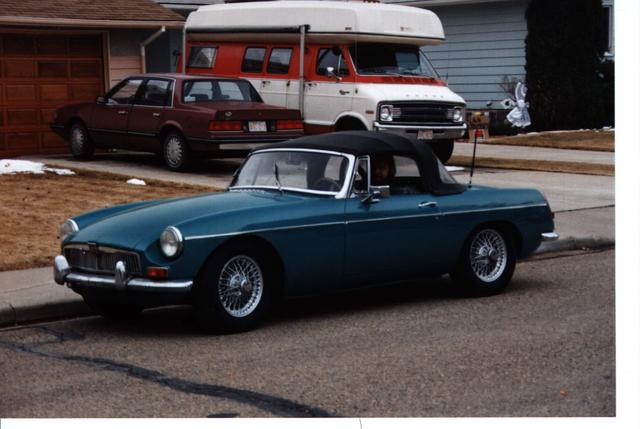
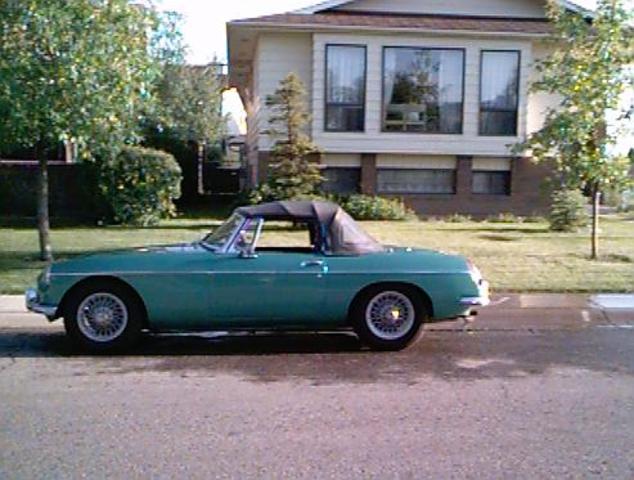
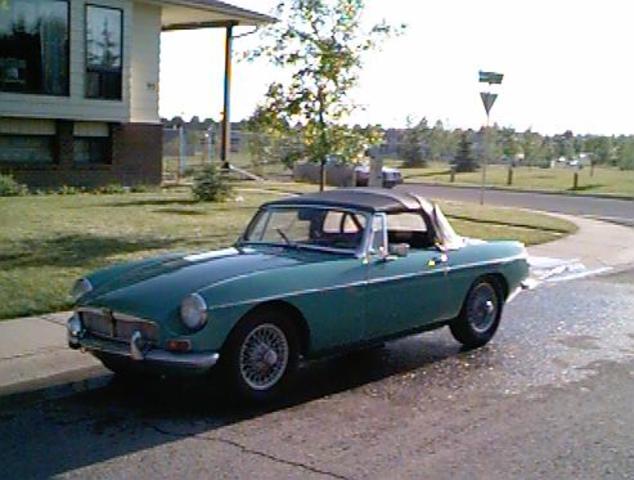
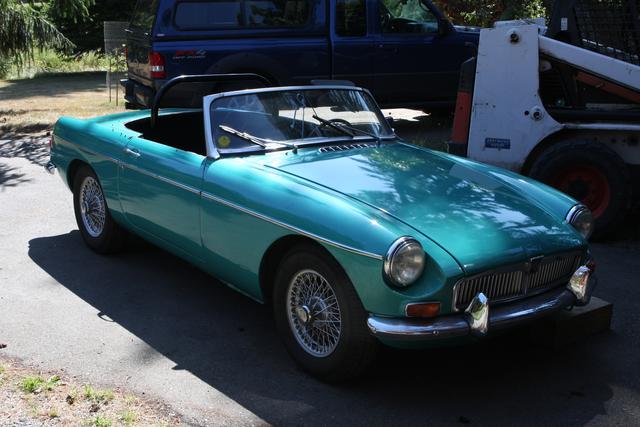
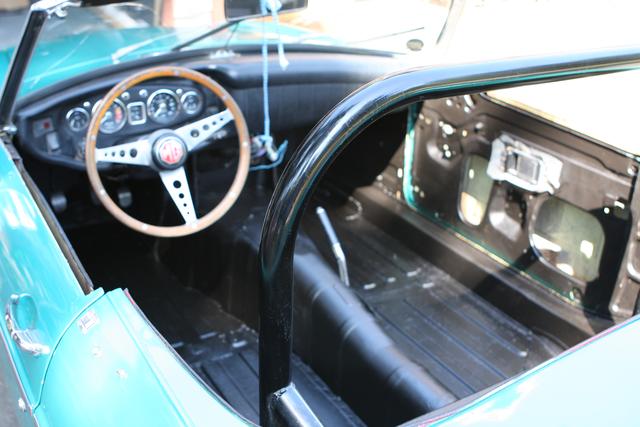
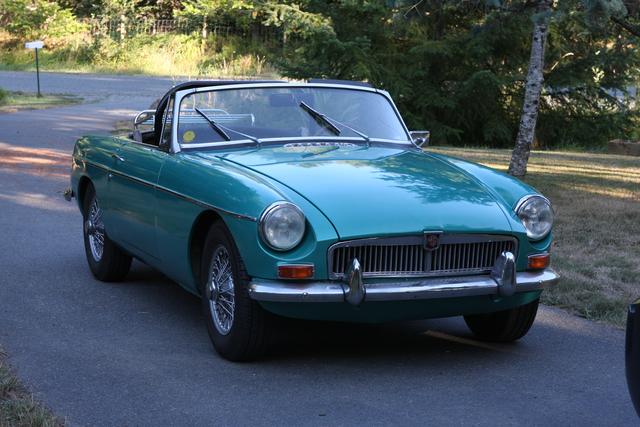
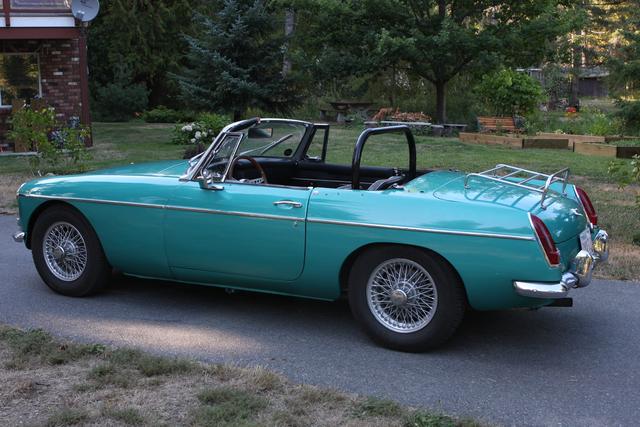
Around 1994, I was working with a couple of British auto enthusiasts, and started driving the MGB again. In 1995, my father had a fellow in Red Deer restore and paint his MGB-GT, and it was a great job. We took my MGB to the fellow and he told us that he could definitely repair the body work - welding in new steel and not just doing a bondo job, and would also paint the car for $1600. I chose a Ford automotive paint (code #64646). I had wanted 'British racing green', but the autobody fellow said that a dark color (like BRG) would show every blemish and urged me to go lighter - hence the shade chosen.
The body work was excellent. I have a video my father took of the various stages, showing where they removed all rotten metal and replaced it with new panels skillfully welded in. Most panels, such as lower fenders, were replacement panels, but under the door no replacement was available, so they hand-formed the sill panel. After sanding, smoothing and priming, the paint went on. The finished MGB looked awesome!
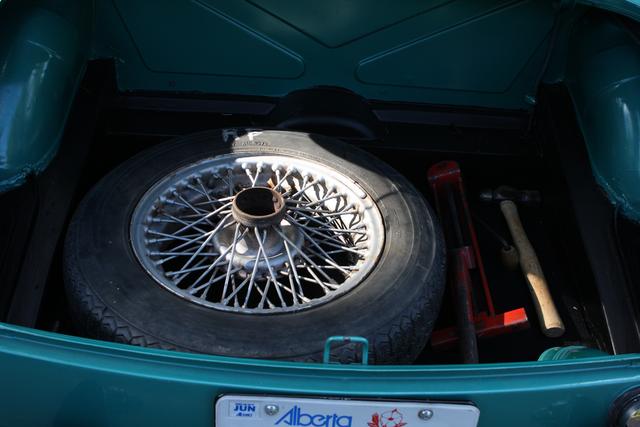
To complete the restoration, the wire wheels were powder-coated by a place in Innisfail (since burned down) for $35. per wheel. Much better than the $250 quoted for chrome! The silver powder-coated wheels look terriffic and were complimented with new tires. With the rebuilt motor, the car looked and performed as new.
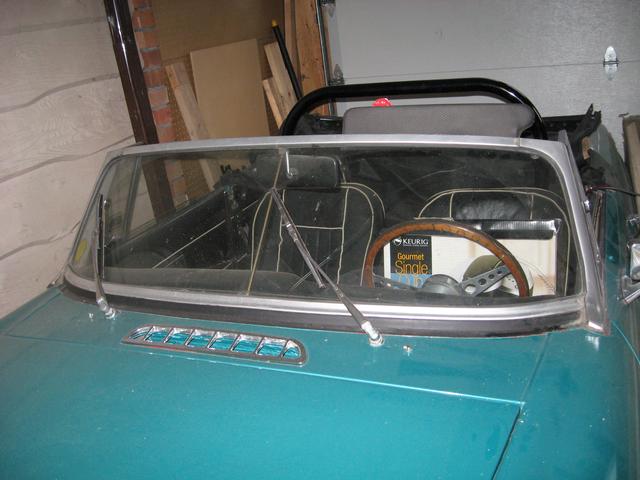
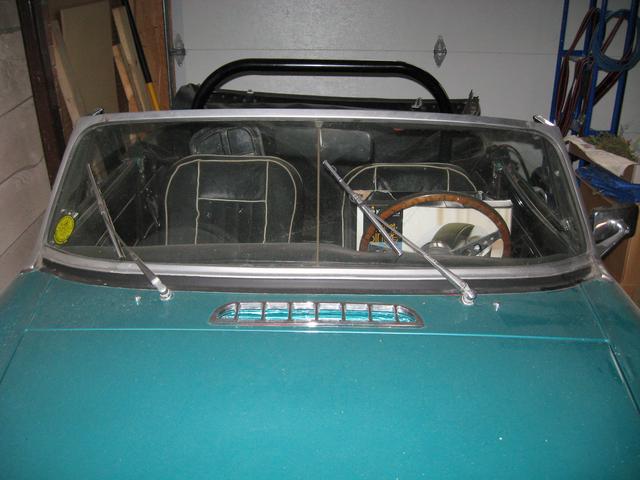
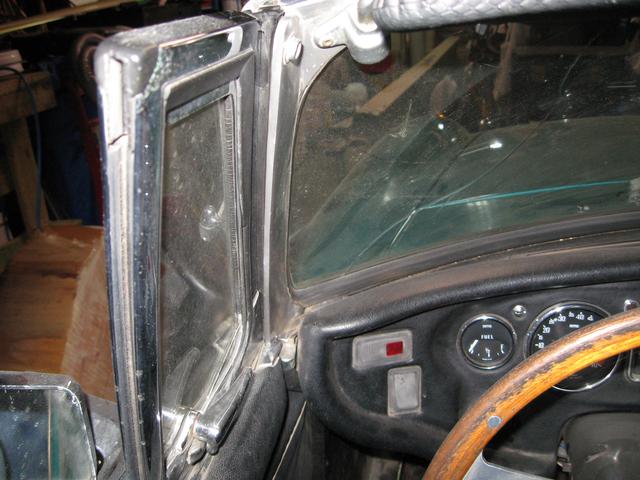
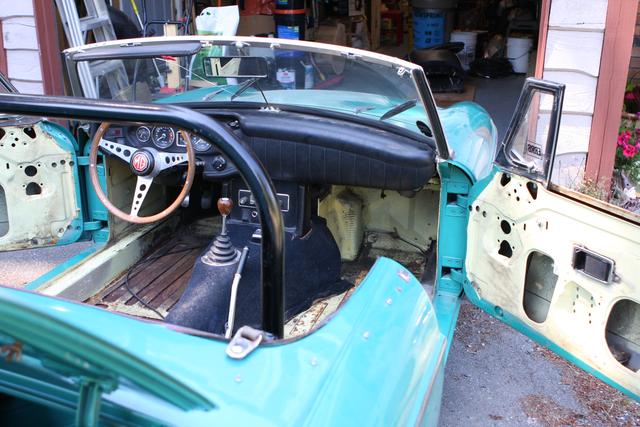
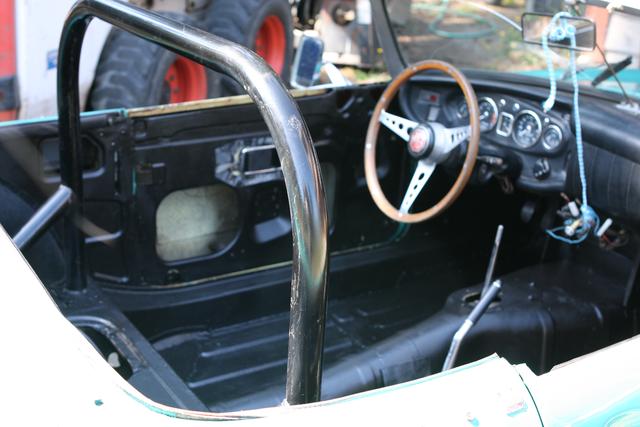
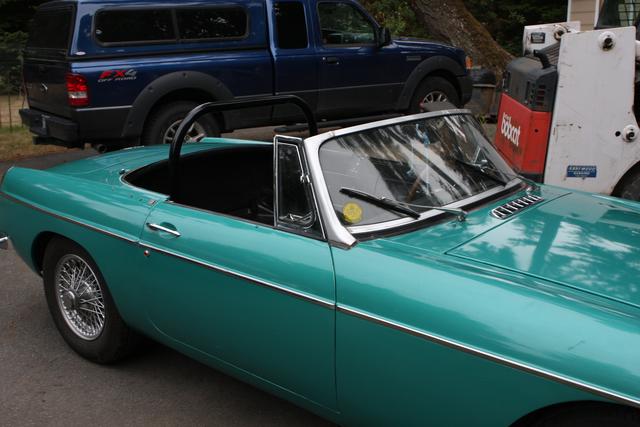
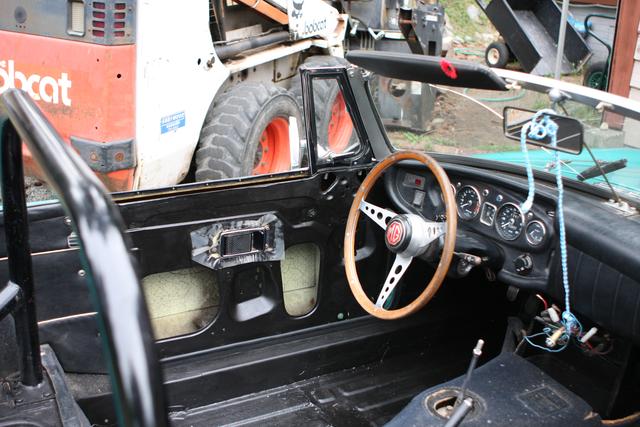
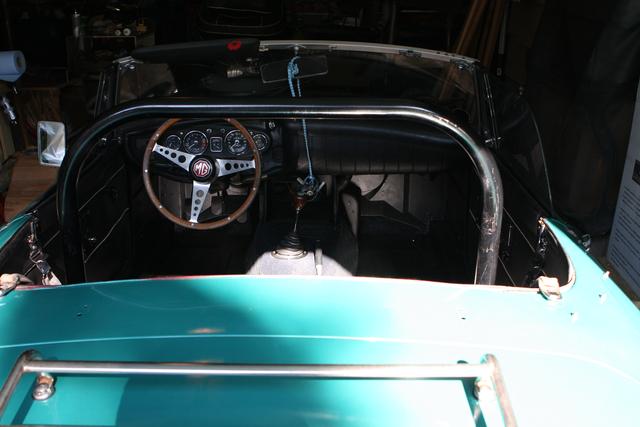
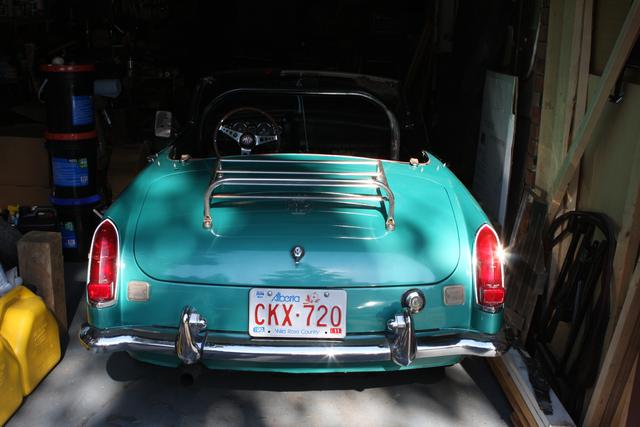
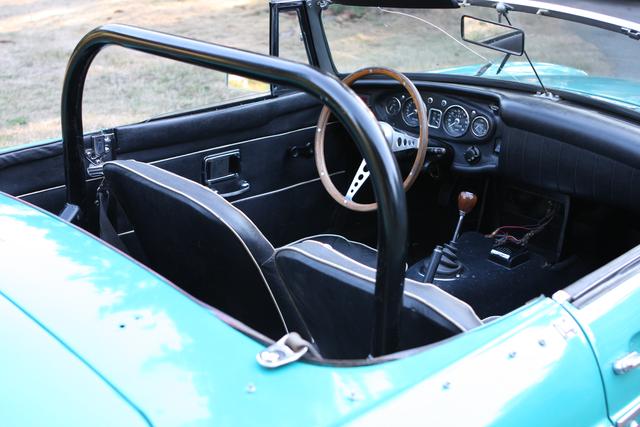
Forward now to 2009. The MGB has been garage stored since the paint went on in 1995, and so still looks very good. There are some small mechanical problems with the clutch (sticking in the dis-engaged position) but nothing major. However, the windshield was cracked from before I bought it, and the interior was never really touched, so it was time to revisit the restoration
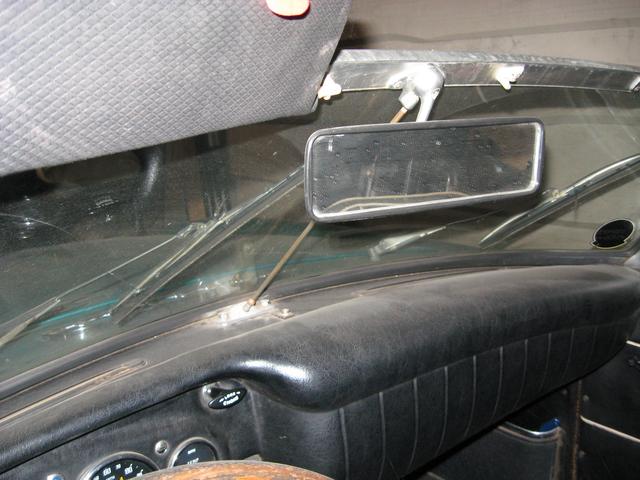
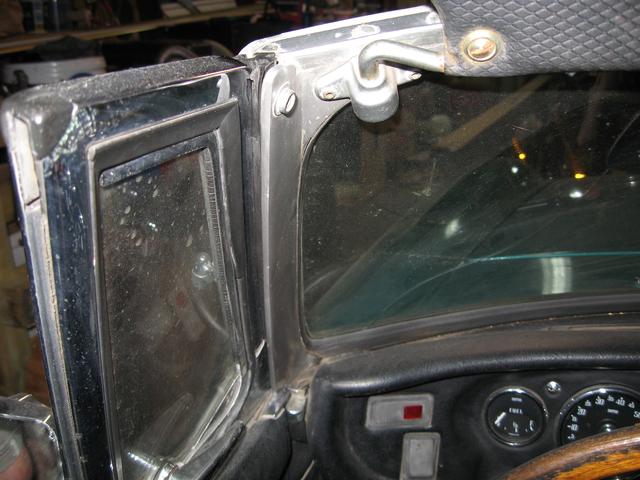
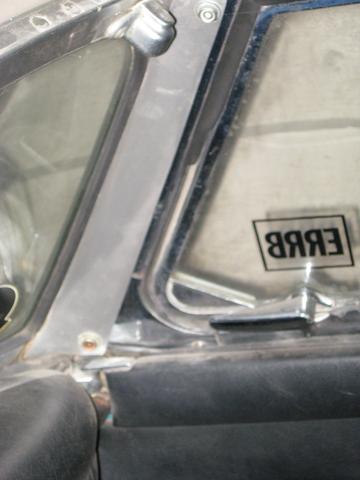
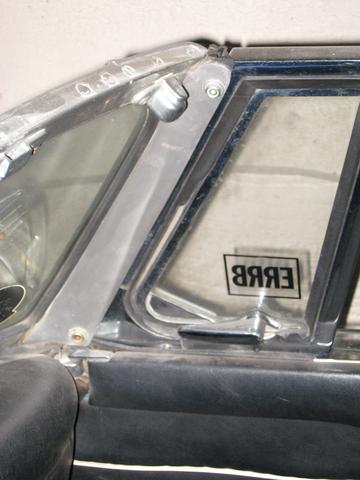
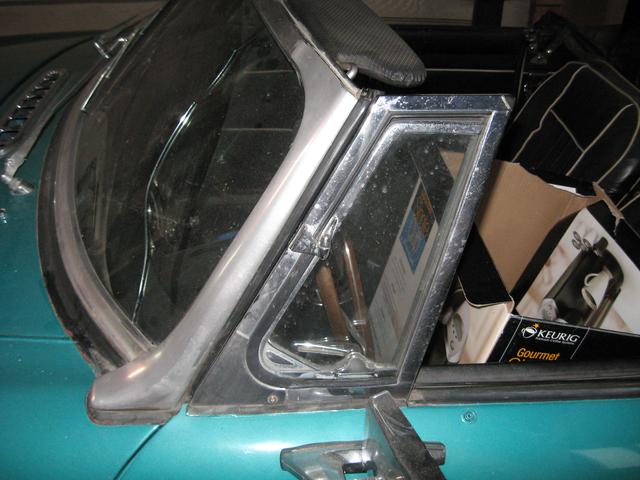
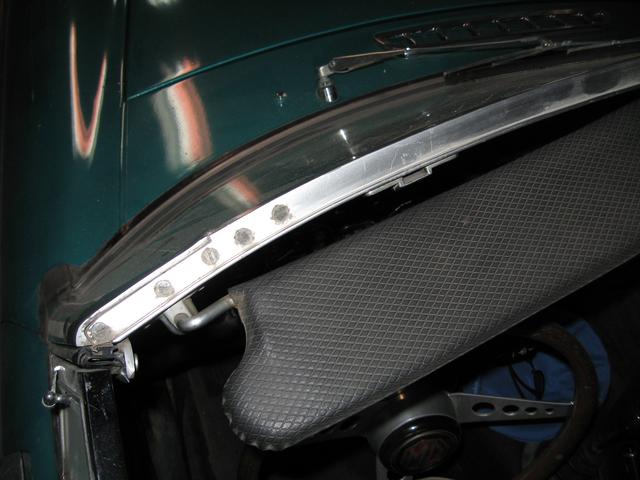
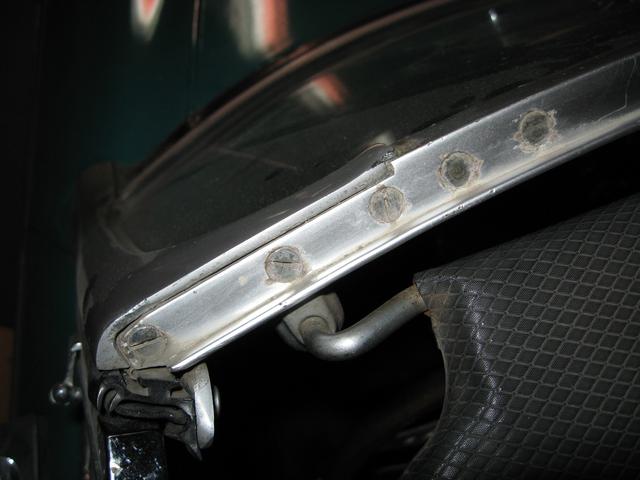
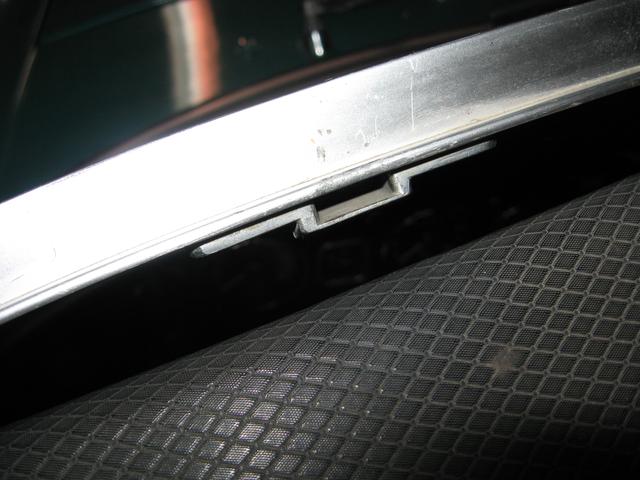
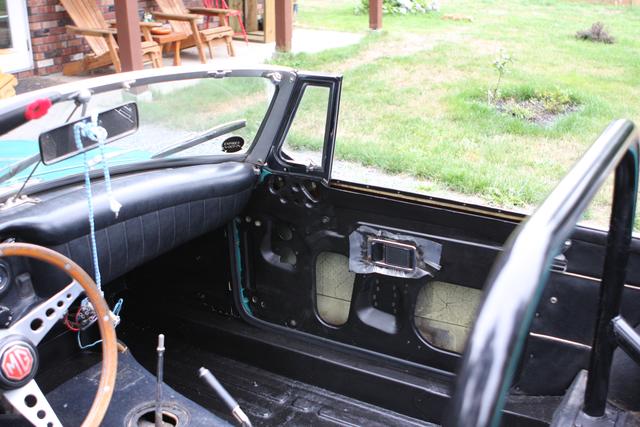
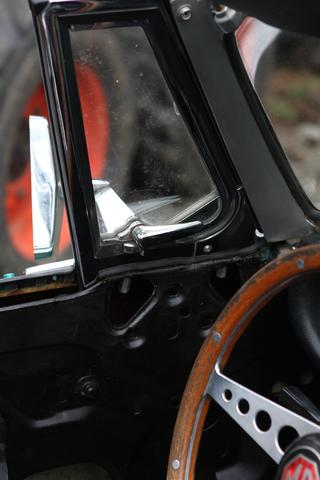
After carefully instpecting and photographing the windshield, I checked out the internet for replacement information. Overall, the information was bleak - replacement was fraught with peril. Common advice was to 'purchase two windshields as you will invariably break the first one trying to install it in the frame". Eventually I decided to see if I could buy a good windshield already in the frame. I found "usedmgbparts.com" had windshields, and was located on Vancouver Island! After a quick trip, I purchased an excellent condition windshield with frame for $100. Since the price of a bare windsheild was around $400 US, I considered that a good deal.
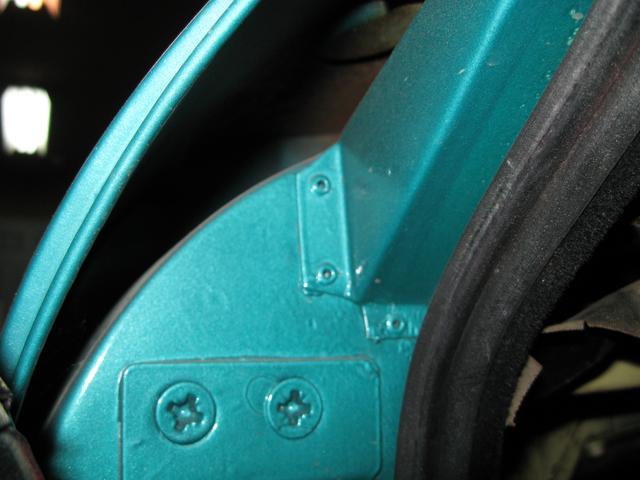
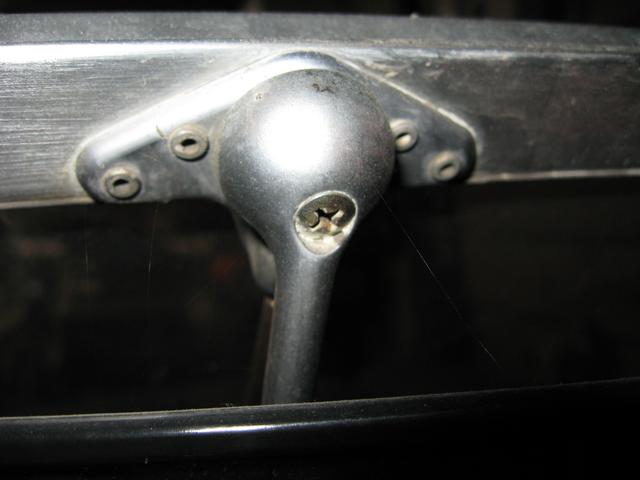
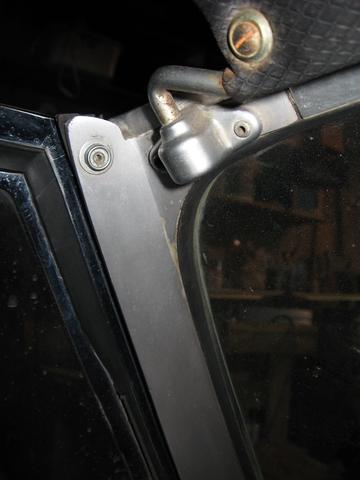
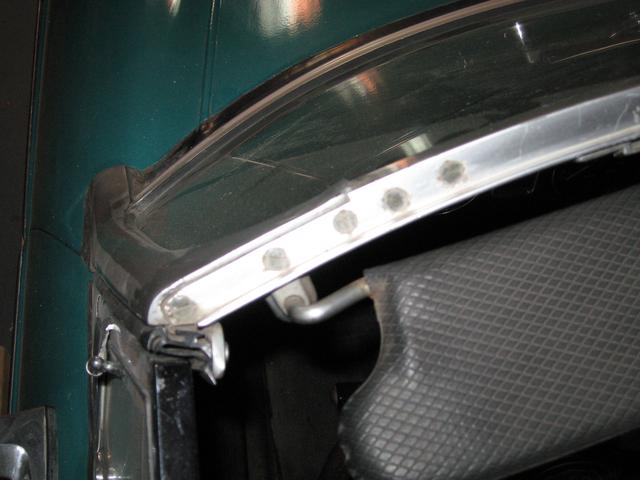
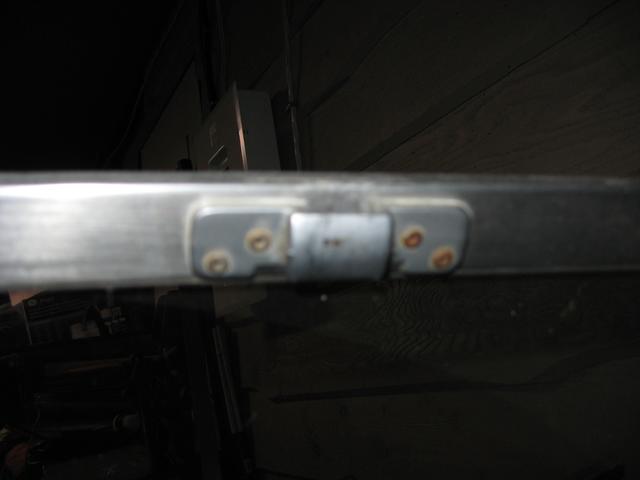
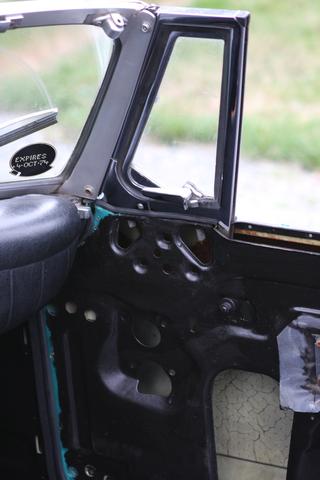
Unfortunately, removing the old windshield was considerably more difficult. There are four bolts holding the pillars in place, and two of them are impossible to remove without first removing the dashboard. Since this is not a trivial task, I opted to defer the windshield replacement until a later date.


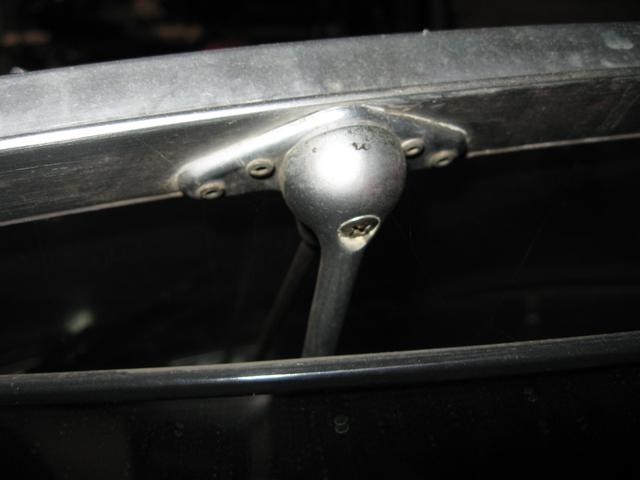
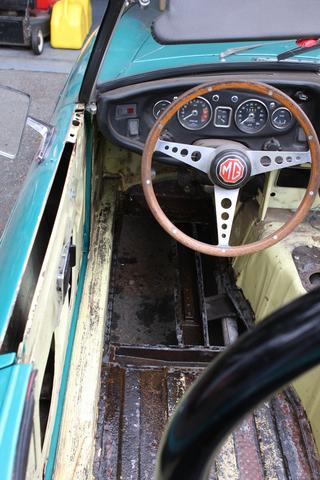
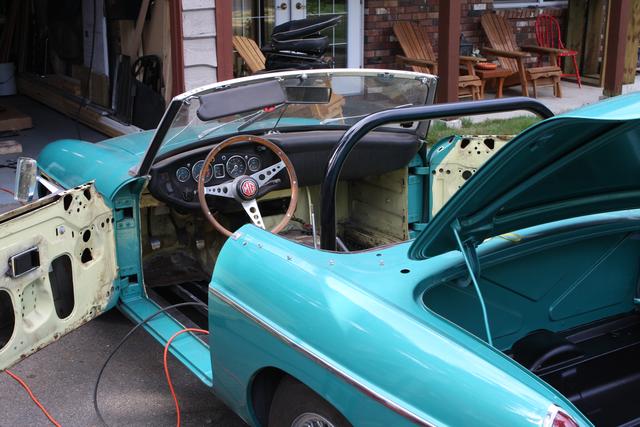
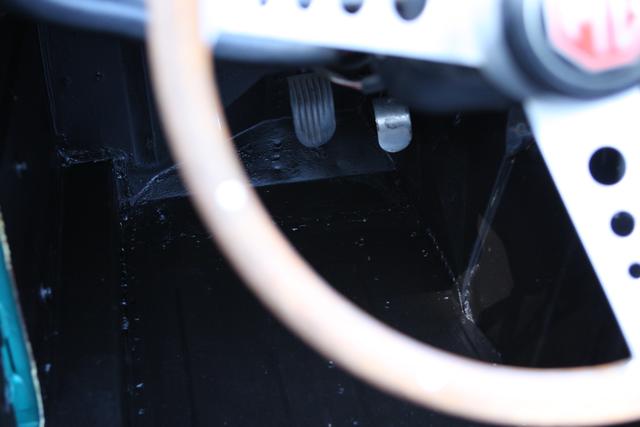
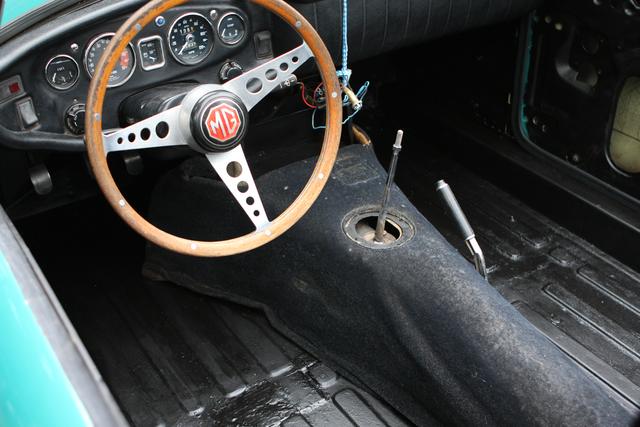
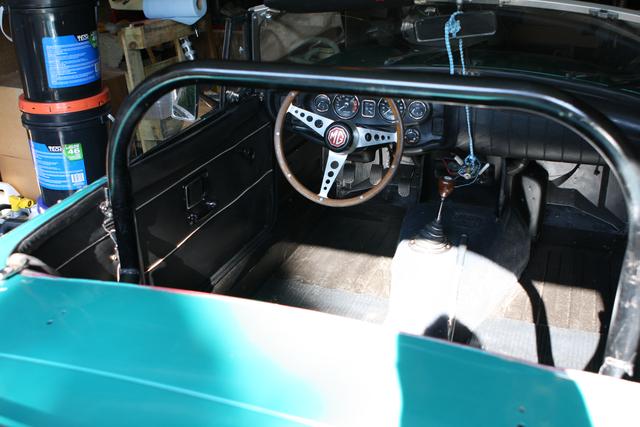
After working on the windshied; lying upside down in the interior trying to remove the pillar bolts, I decided to work on the interior.
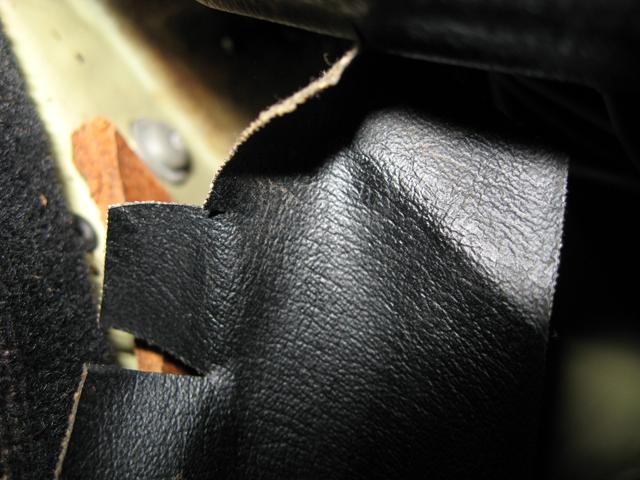
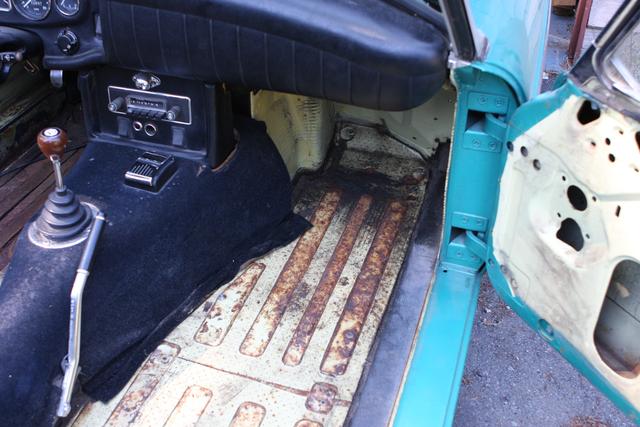
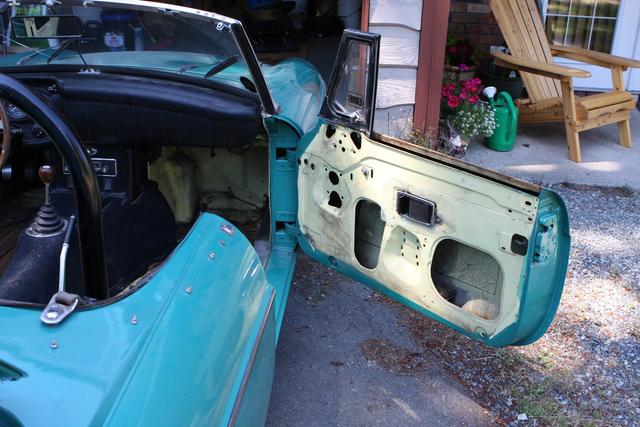
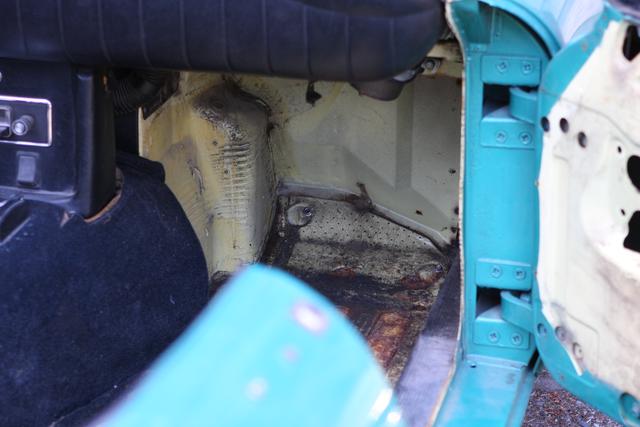
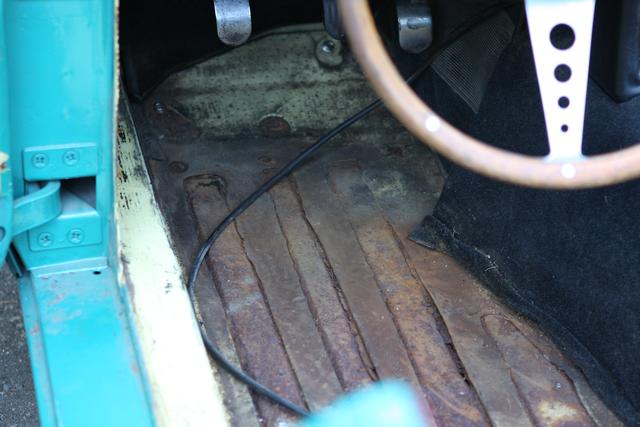
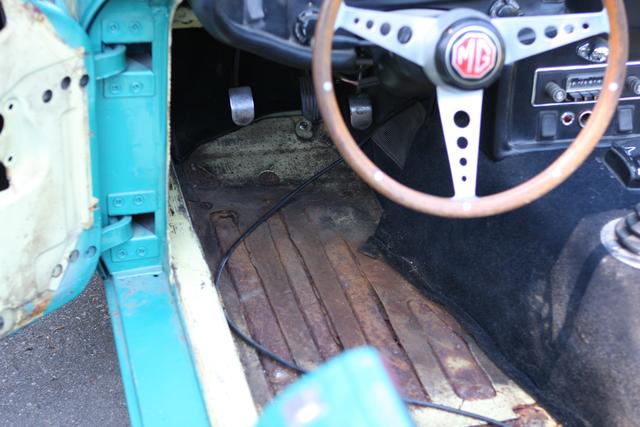
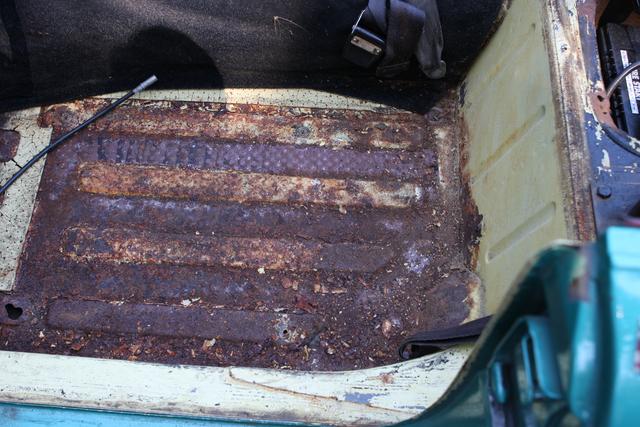
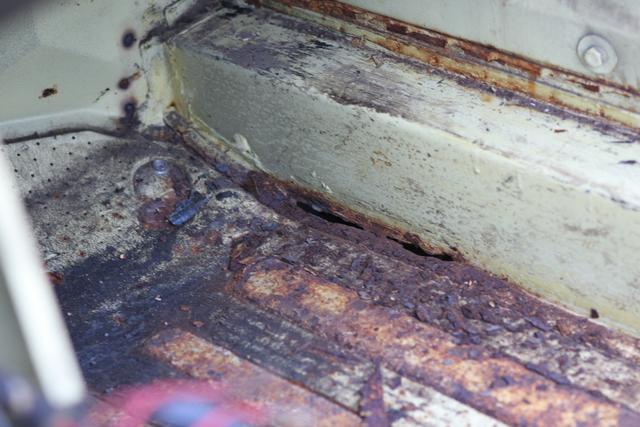
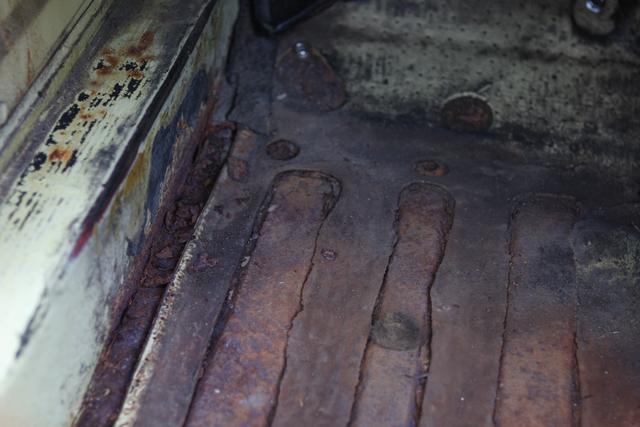
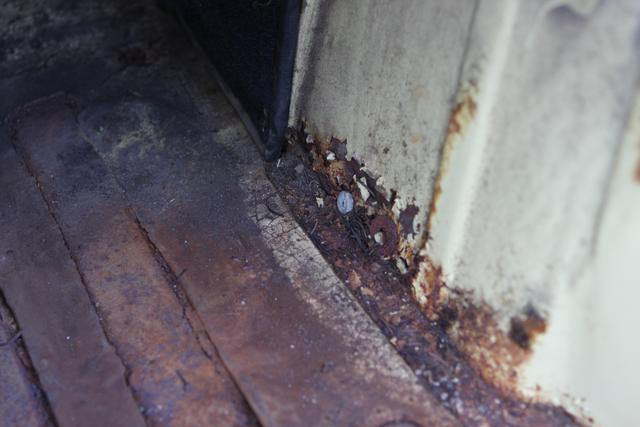
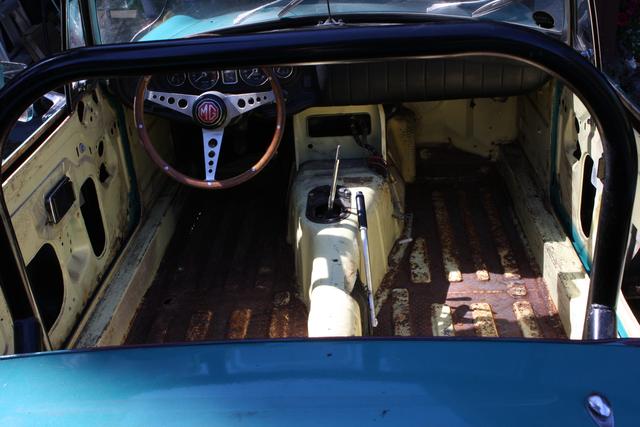
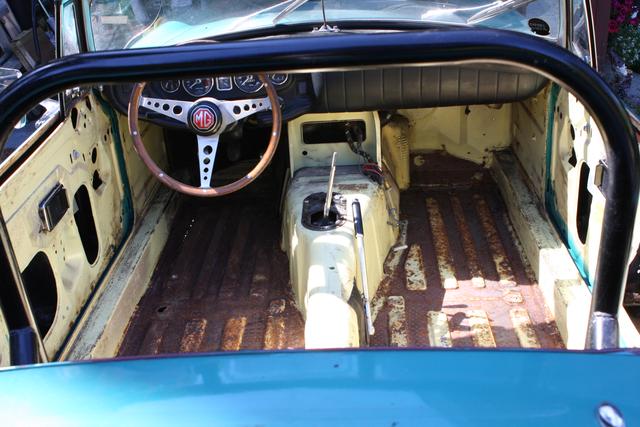
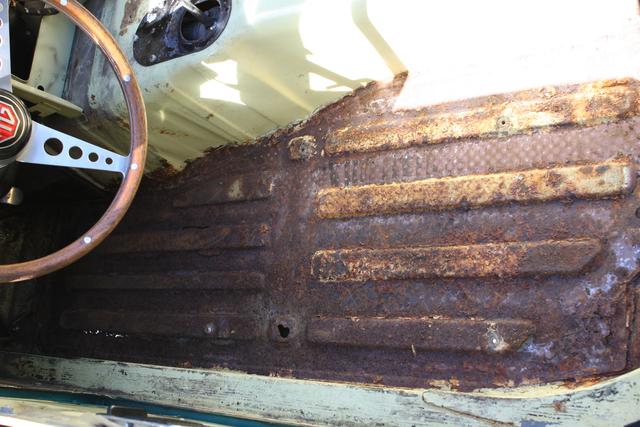
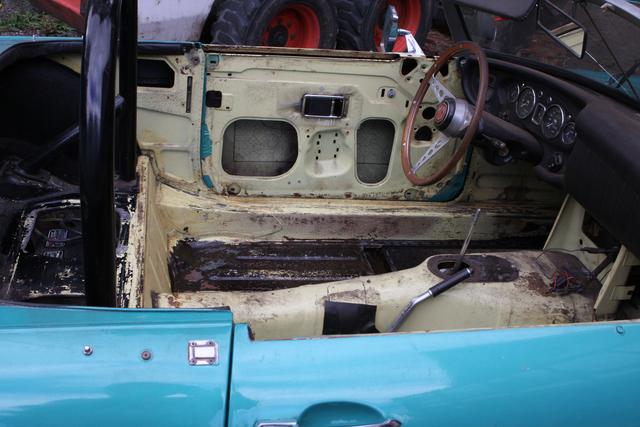
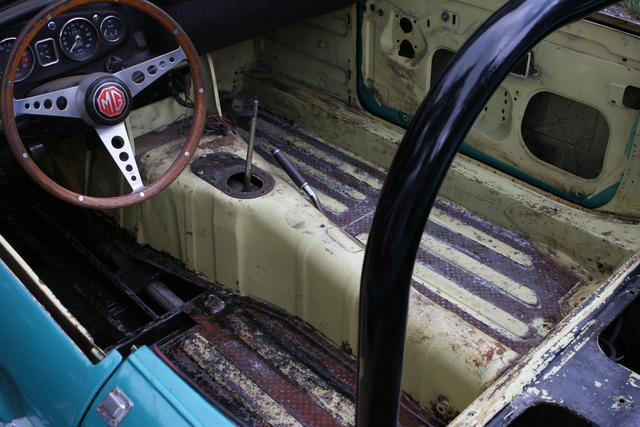
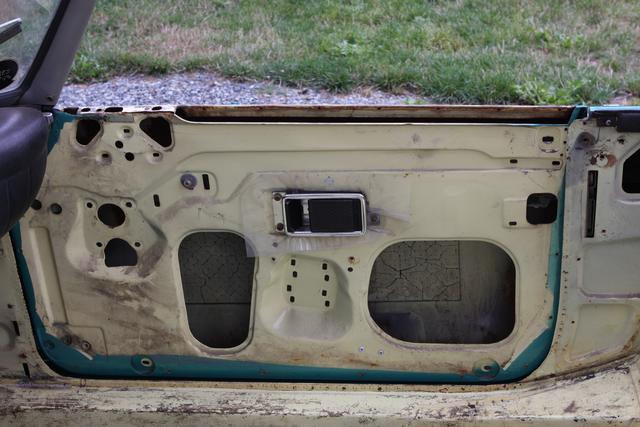
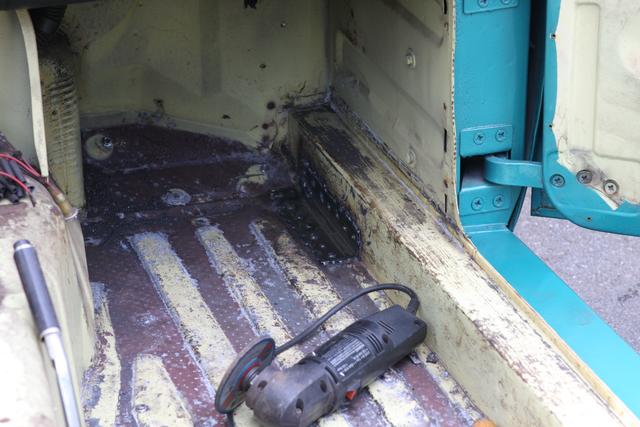
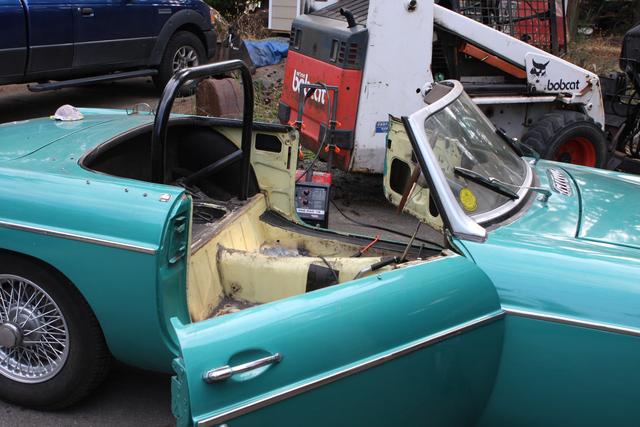
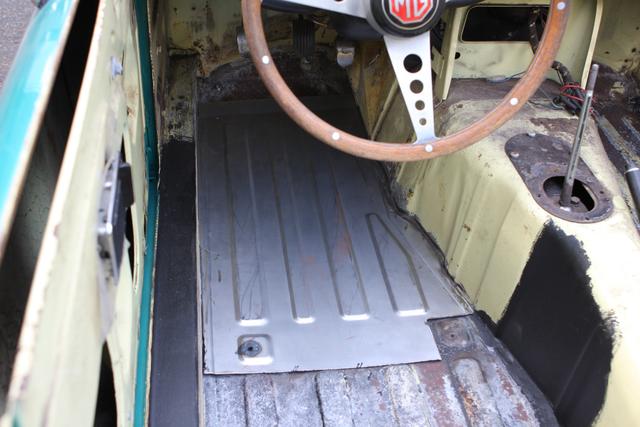
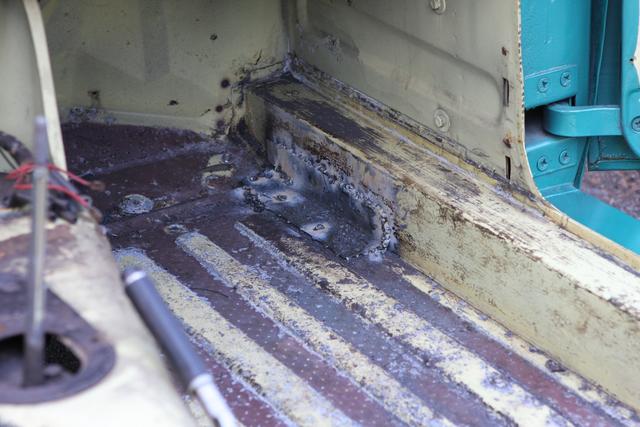
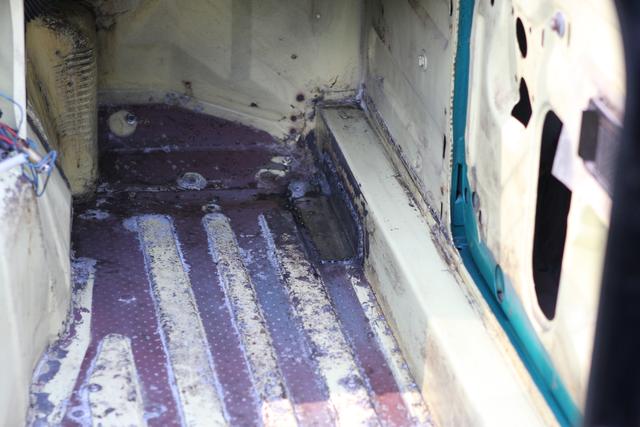
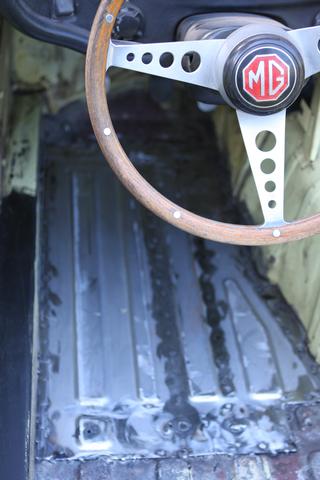
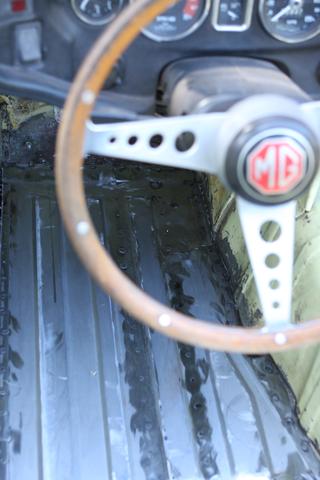
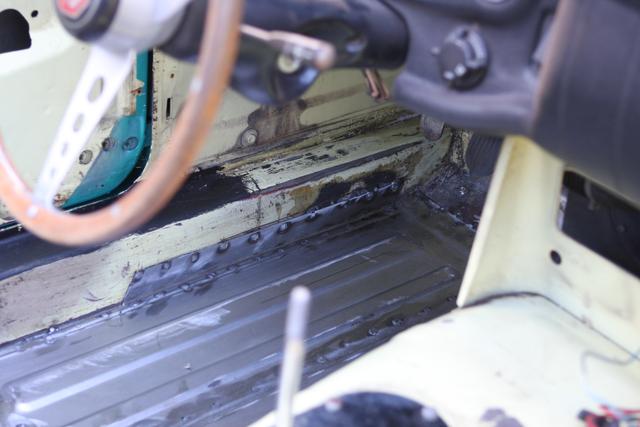
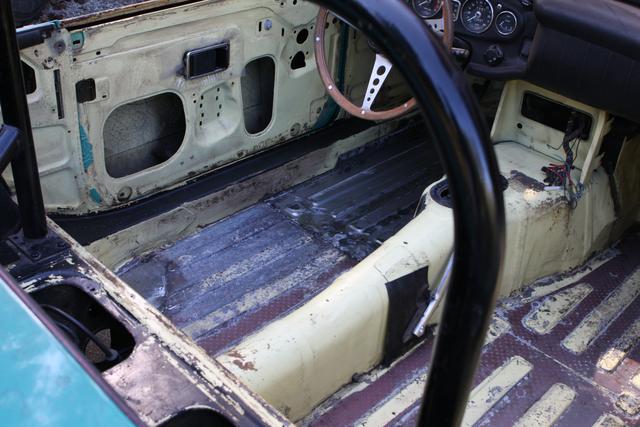
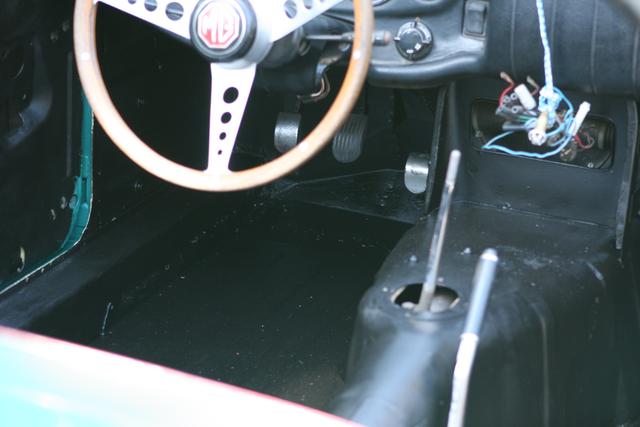
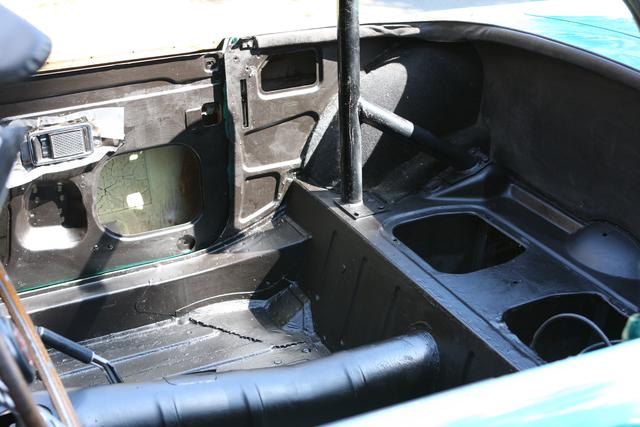
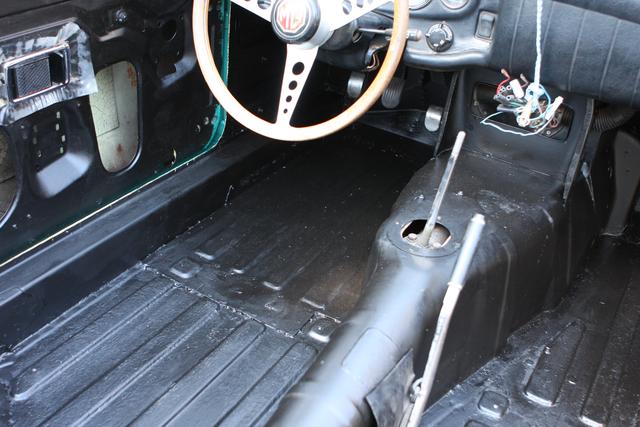
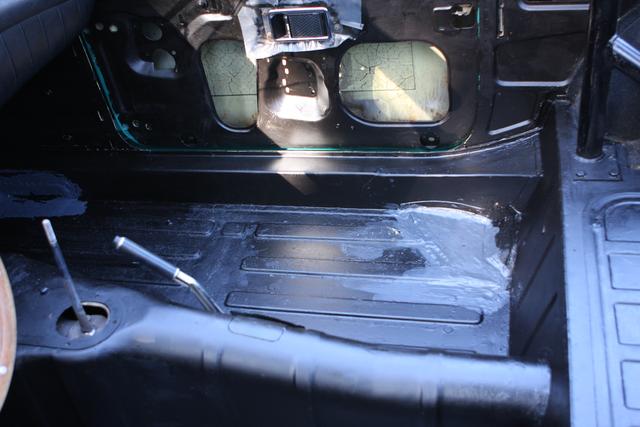
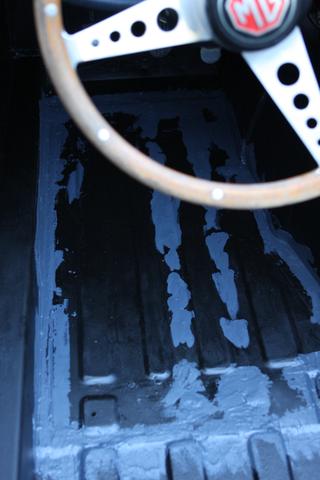
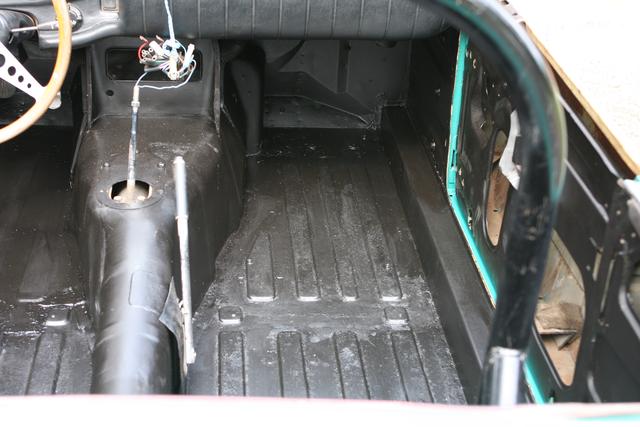
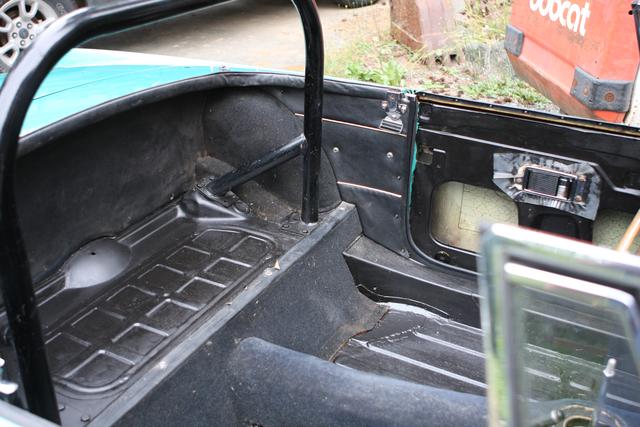
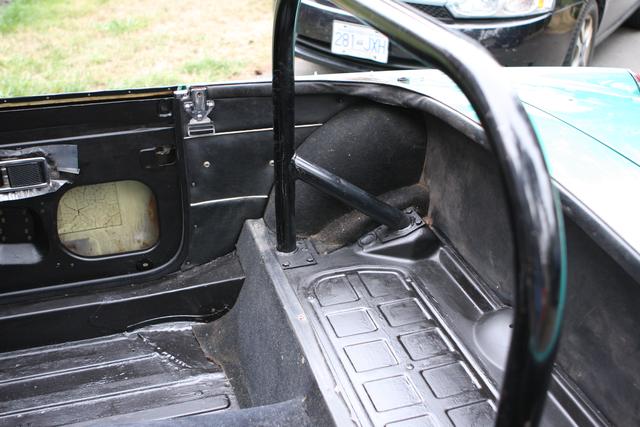
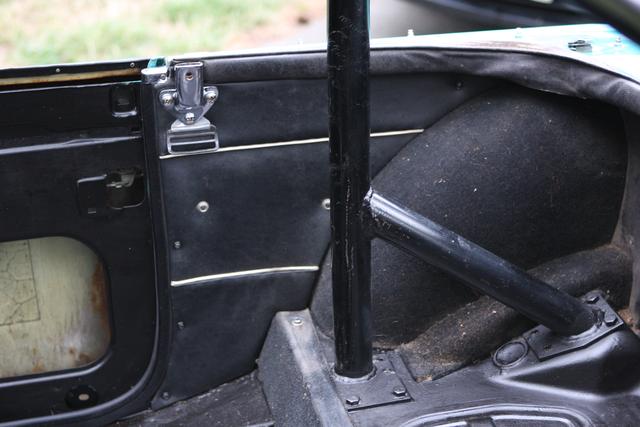
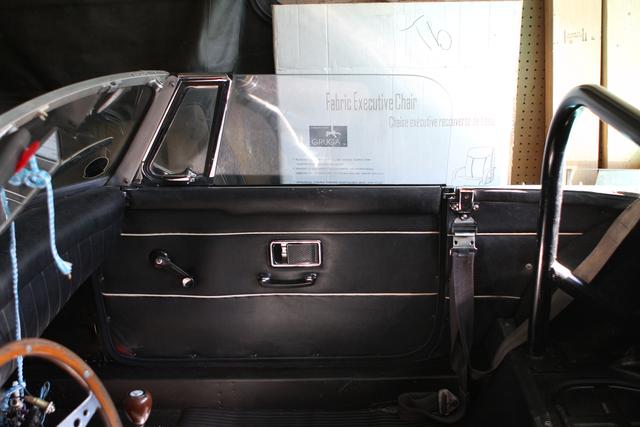
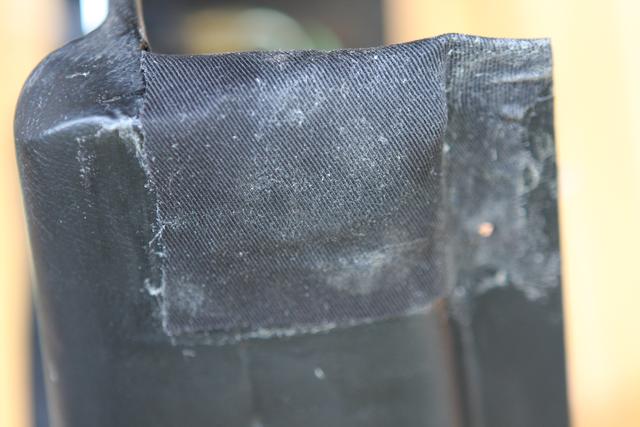
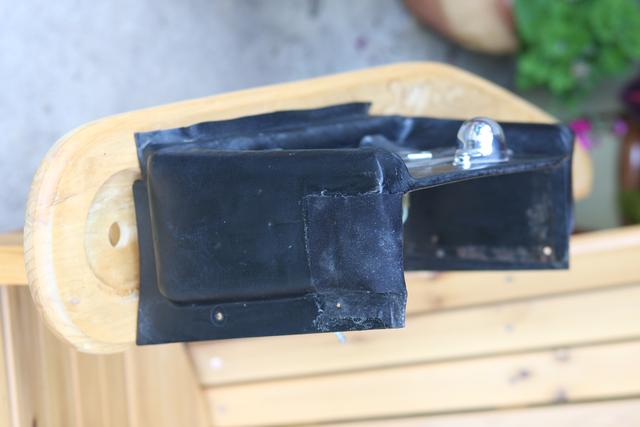
The door outer wiper was pretty much dry and cracked, and the inner seal threadbare, so I ordered new door wiper and seals. The door seal was also threadbare with the wire core poking out in spots, so I ordered a new set of these as well. Of course, nothing is really easy. To replace the door window seal, you must pop-rivet it to the outer door. However, you can't do this without removing the window, so that came out. In order to remove the window, the window mechanism had to come out as well. At least I was able to lubricate the winder mechanisms.With the door panels off, I could see the original yellow color, and wanted to paint it black "for show". Thus began ther removal of all interior panels. This lead to my first big "mistake". I removed the forward floor carpet. OOPS! RUST-OUT!!! Indeed, the driver's floor was rotted through in many places. The passenger floor also had a rust-through on the outer wall. Time for drastic action!
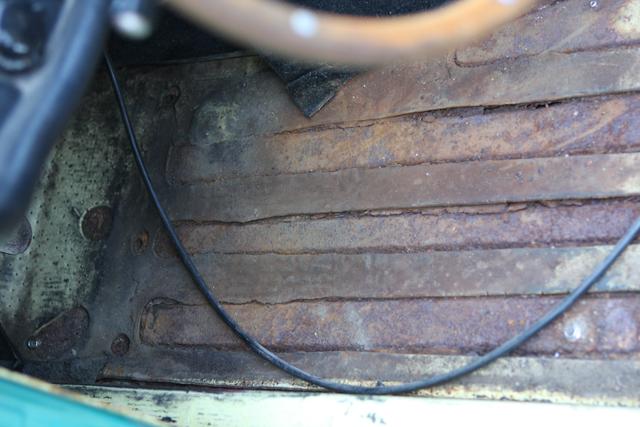
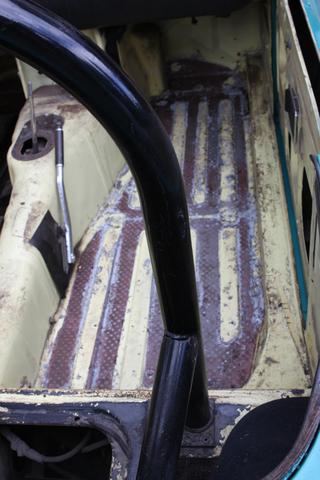
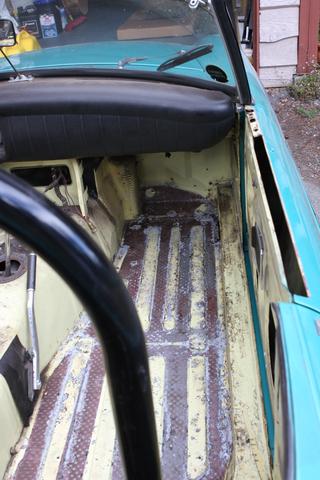
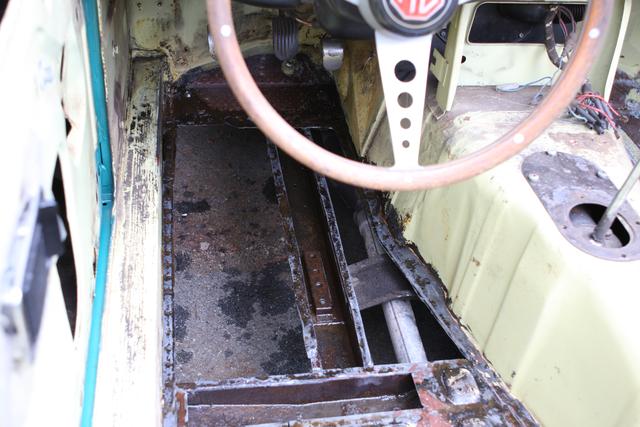
With the seats removed and all the floor laid bare, it was clear the driver's side had to be replaced. How much was yet to be determined.


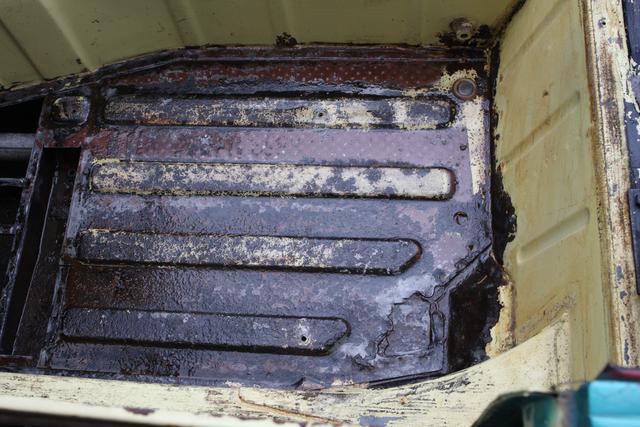
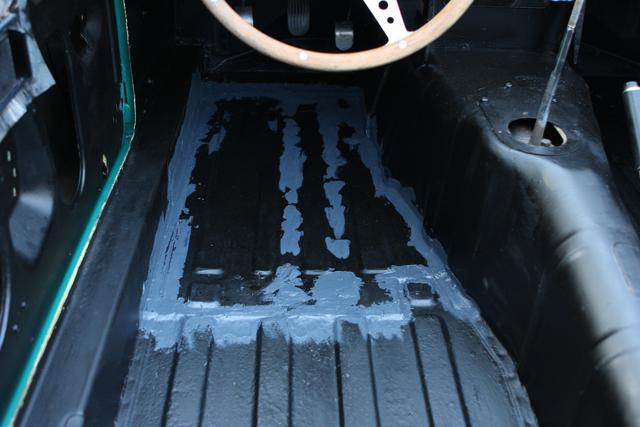
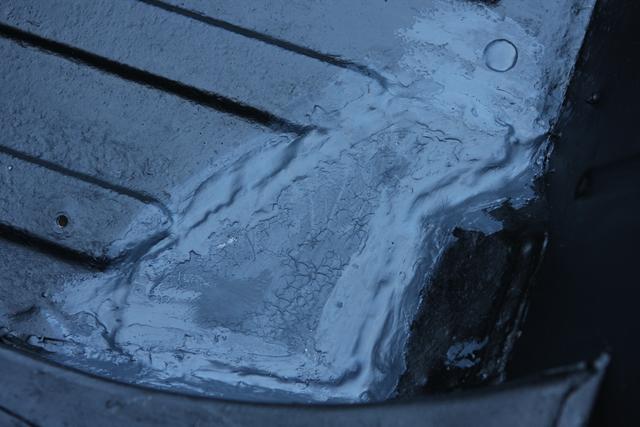
After consideration of the situation, I purchased some "Rust Mort", a solution of weak phosphoric acid and other chemicals designed to convert rust (iron oxide) into a stable solid (iron phosphate). I applied the rust mort to both floors, waited 24 hours and rinsed it off.
A new driver's side floor pan was ordered from Octagon in Vancouver at $135. The new panel came without seat mounting hardware, but that was fine as I was not going to use the whole panel
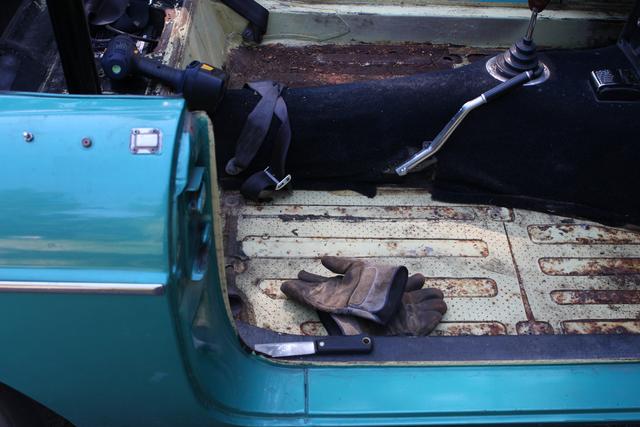
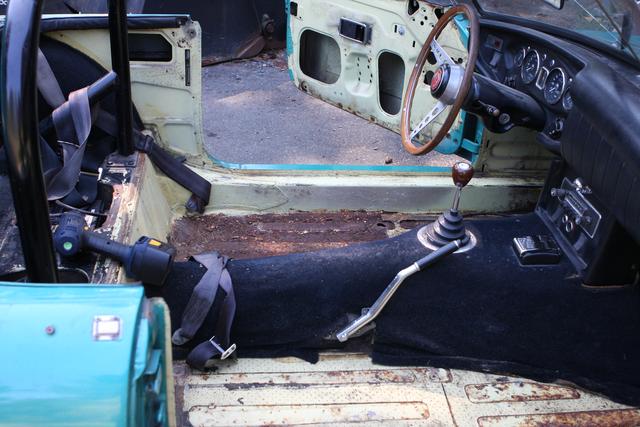
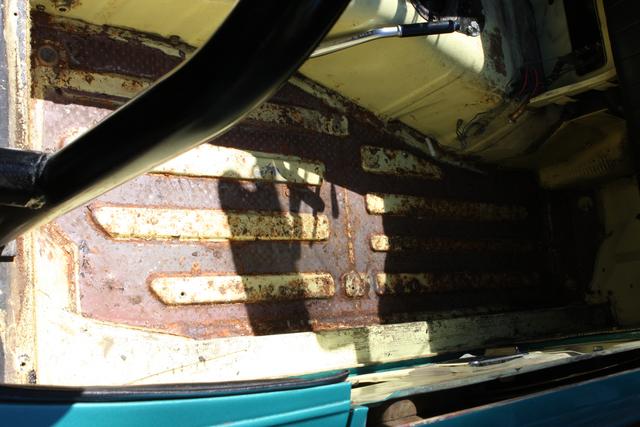
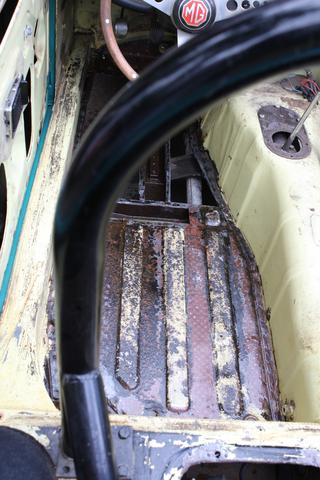
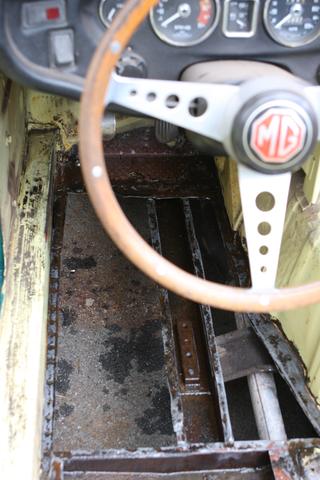
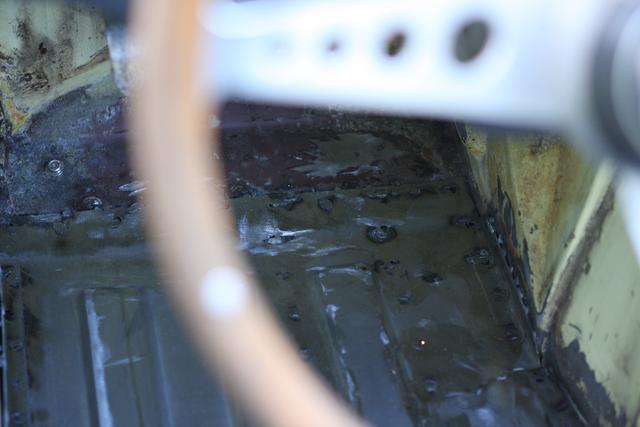
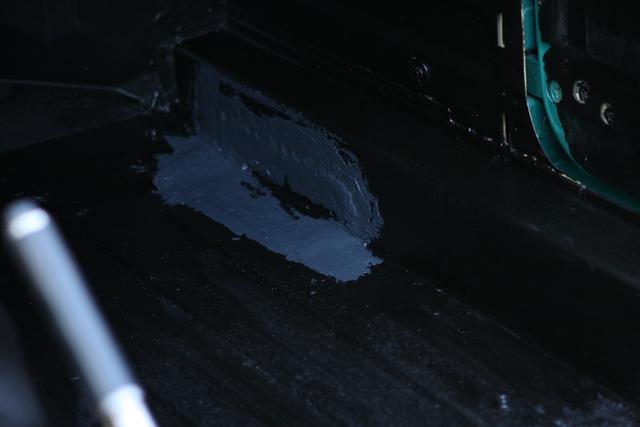
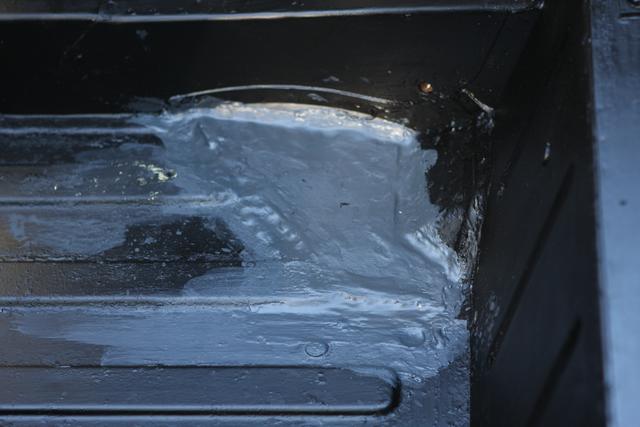
The rust mort application was a success! It also revealed that the only significant damage to the floors was under the driver's feet (including one seat mounting nut), the passenger front outer panel, and the area over the rear spring hangers.
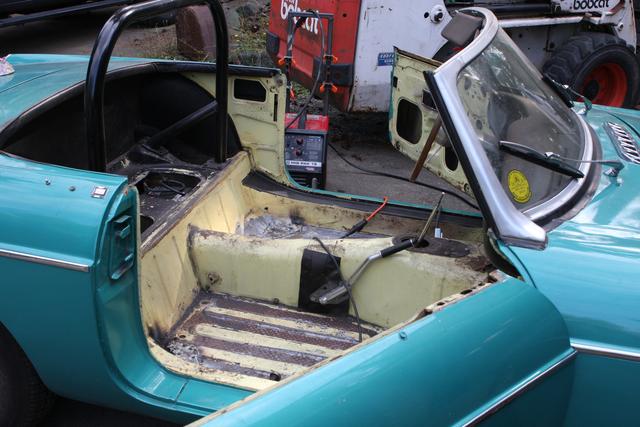
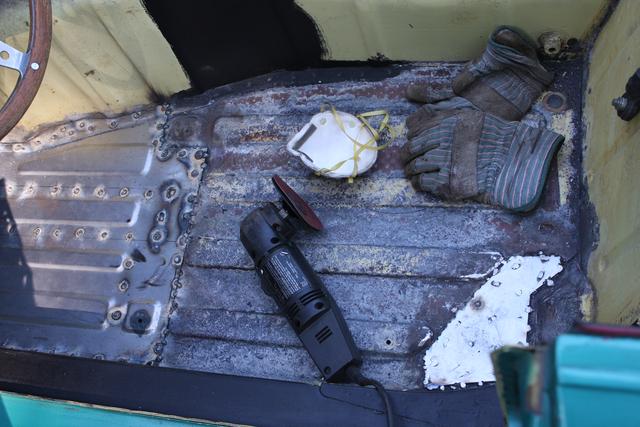
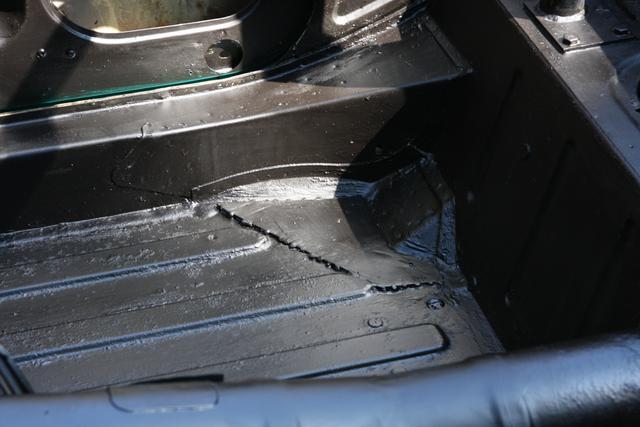
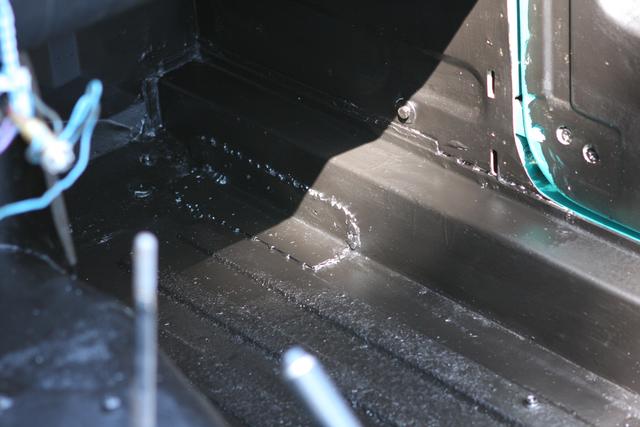
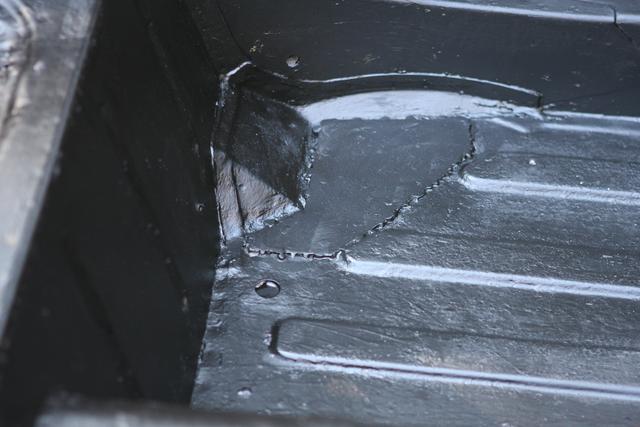
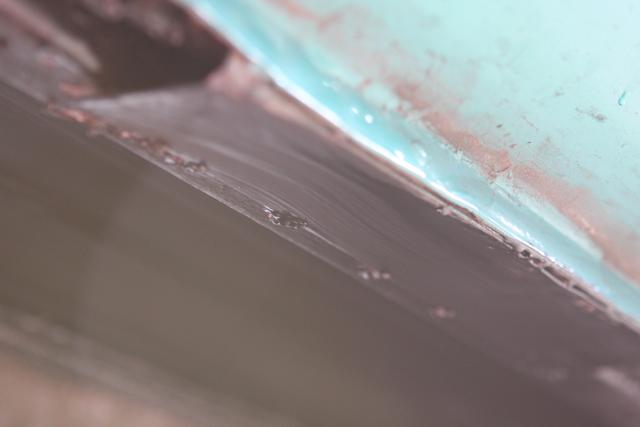
Readying the trusty B&D 4" angle grinder with wire brush and grinding disk, I prepared the rusty areas. The driver's floor had to be removed, but I wanted to preserve the floor behind the main cross-member support (excepting the outer seah anchor). This was short work for the grinder with a metal cutting disk. Likewise, the area over the spring hangers was ground out with a grinding disk. When done, the car was ready for the new metal.
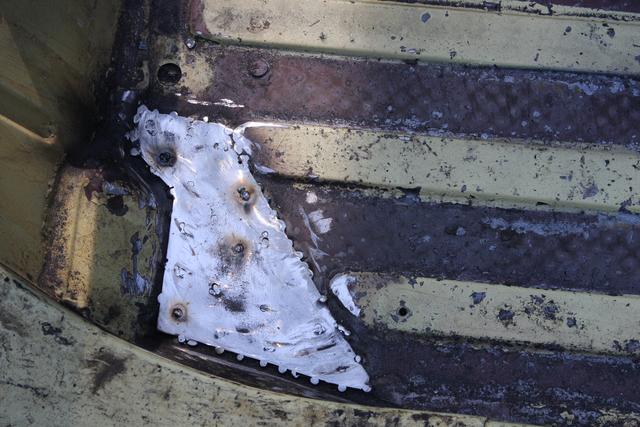
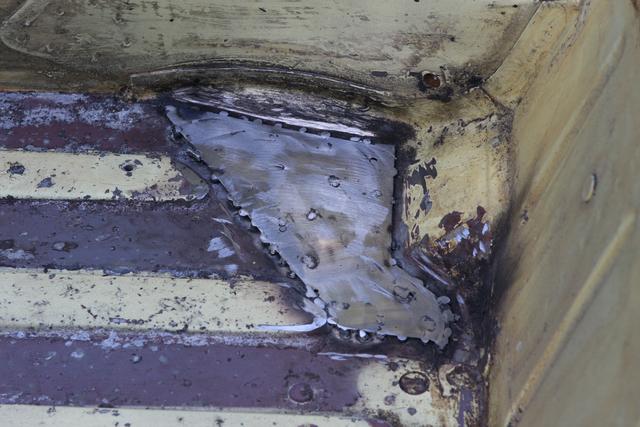
After this, the new floor pan was cut to fit the opening. From the unused material, I also cut panels for the passenger's side fix and the spring mount areas.

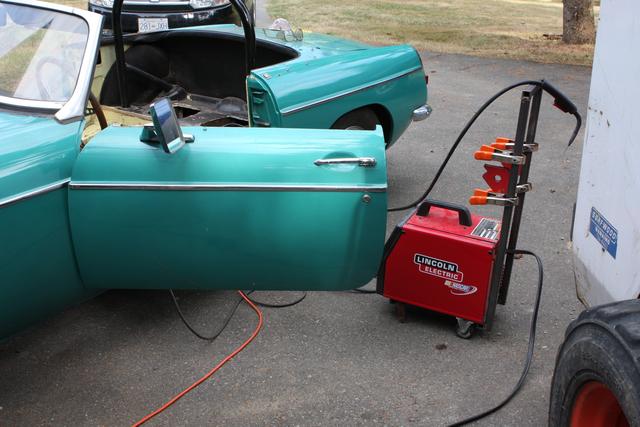
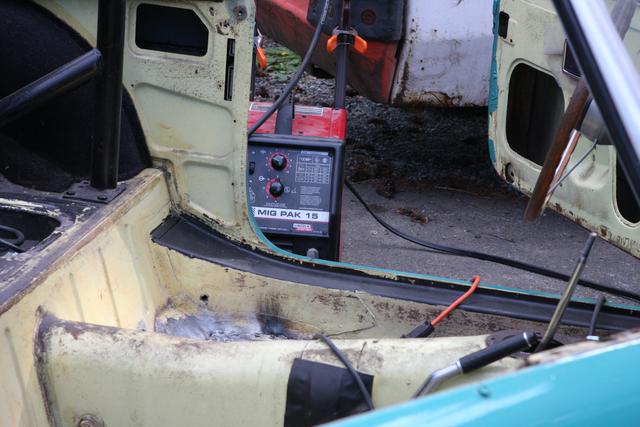
I spent the time from Aug 11 to the 22nd practicing my plug welds. It took some internet research to find the correct settings for my 220V Lincoln welder; lowest power but medium-fast wire feed. After I was happy with my test welds (new metal on old stock, old stock to old stock, etc.), I was ready to try my hand at the actual repair.
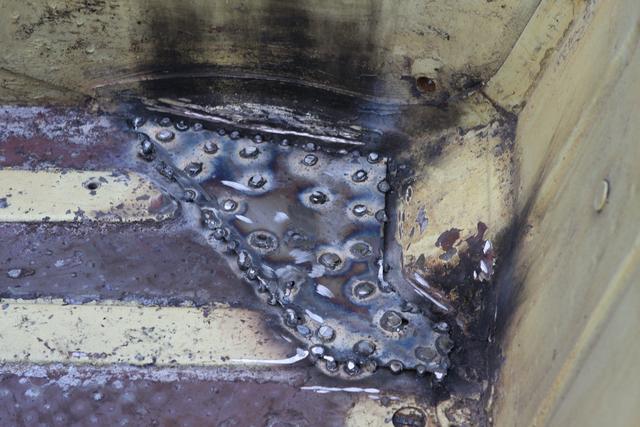
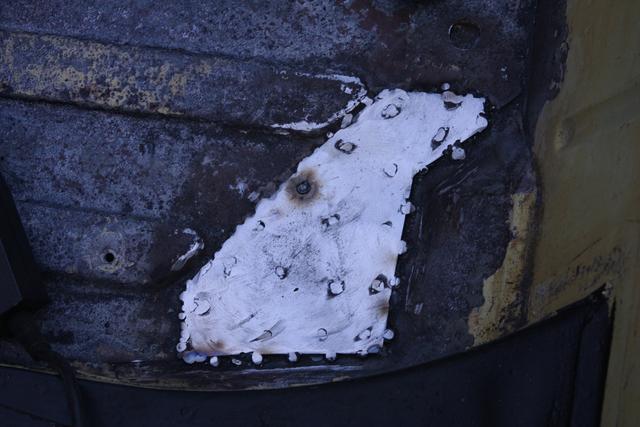
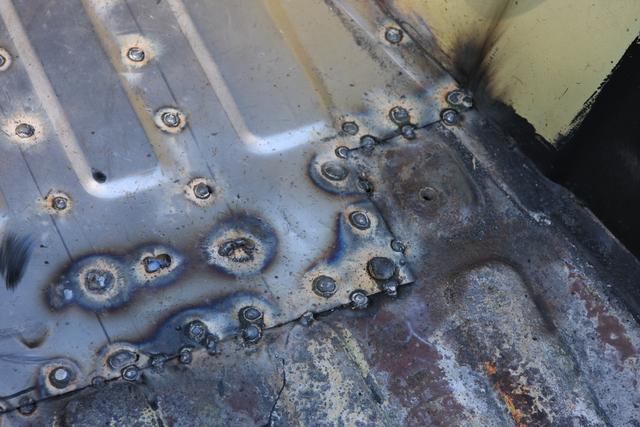
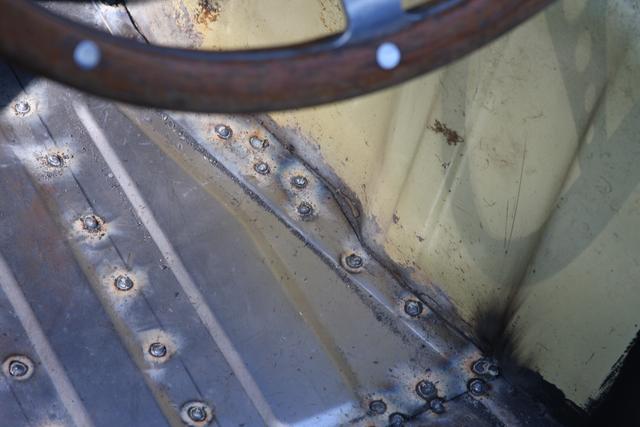
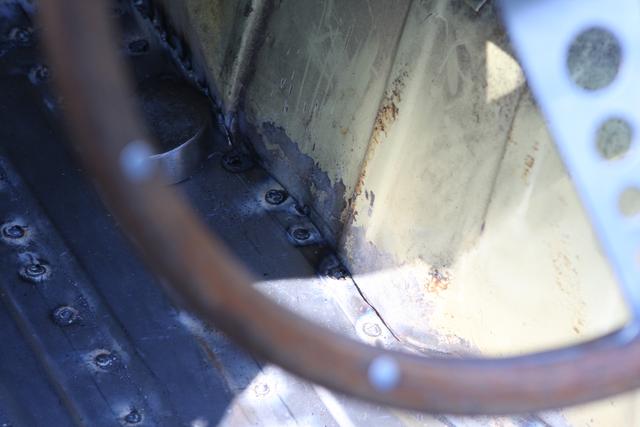
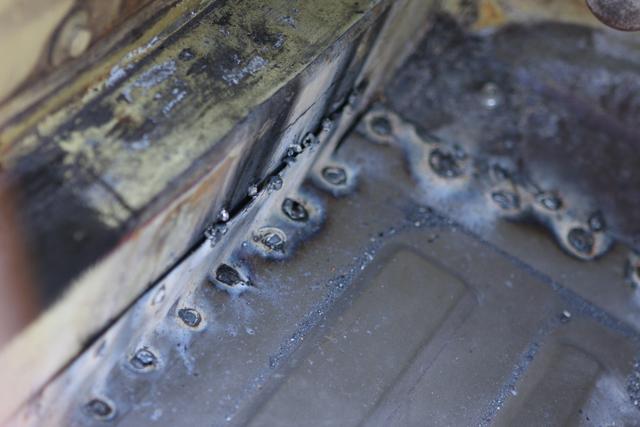
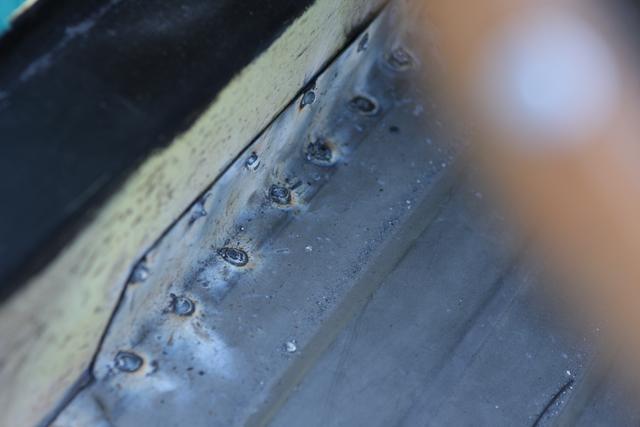
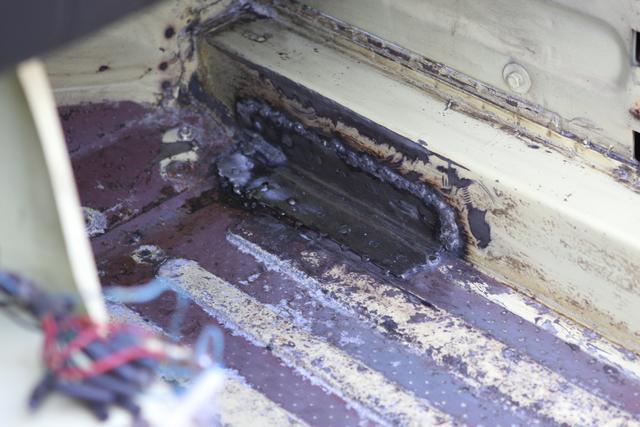
Plug welds involve drilling approx 7mm holes about 1.5 inches apart on the new panel, then welding that to the old floor. First I tackled the driver's side spring plate. That was OK, so I moved on to the passenger side front patch, then the passenger side spring plate. After I was done, I concluded my welds looked like absolute CRAP!. Some welds were not holding well either. I adjusted my process, and repeated the welds, including tacking the edges until I was happier. However, the welds still stuck up someting awful.
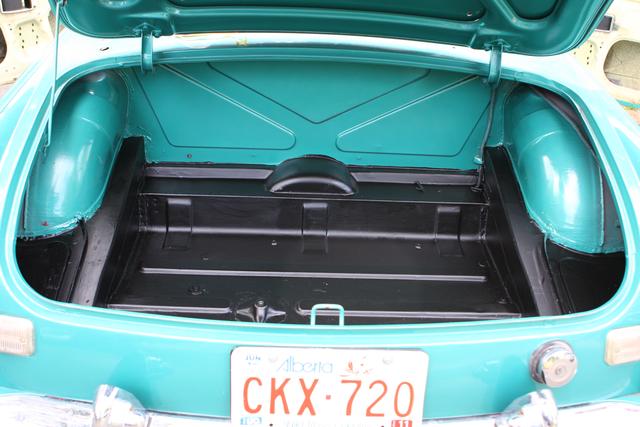
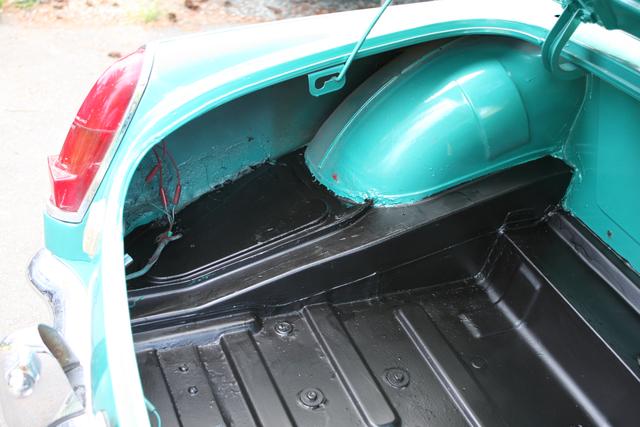
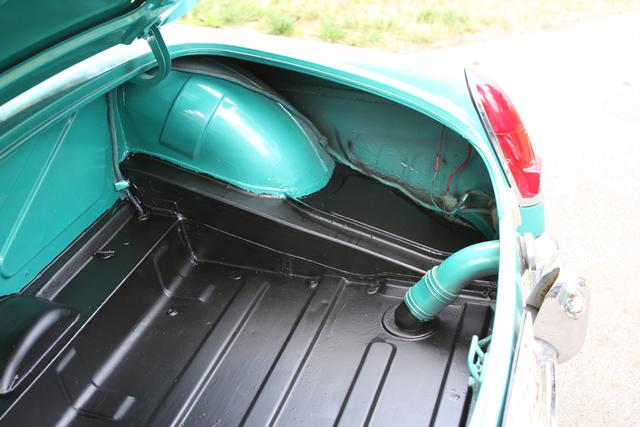
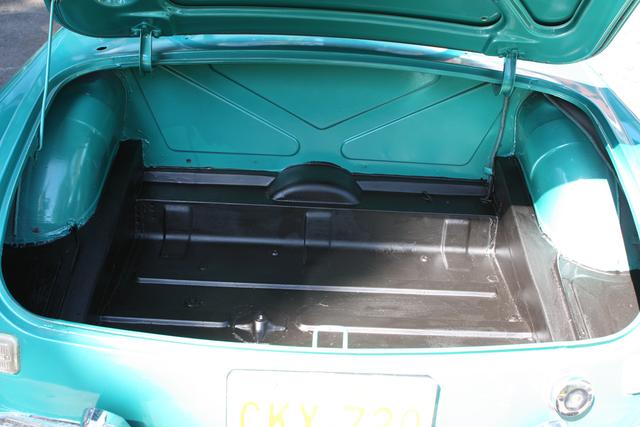
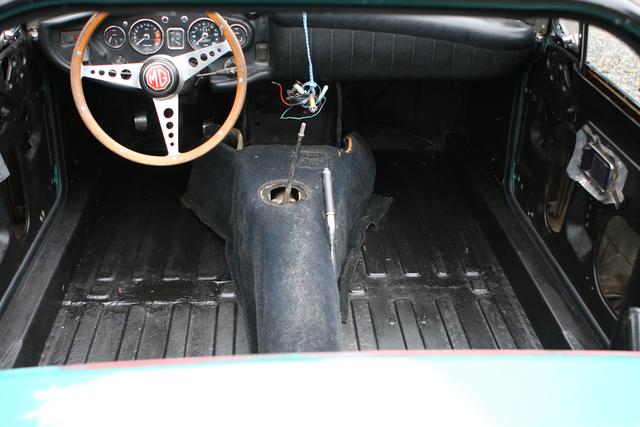
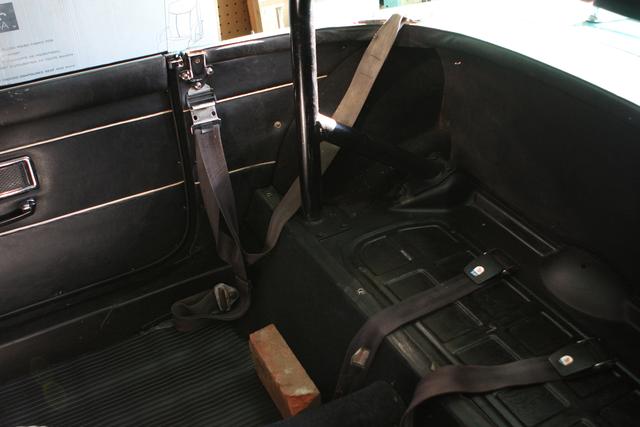
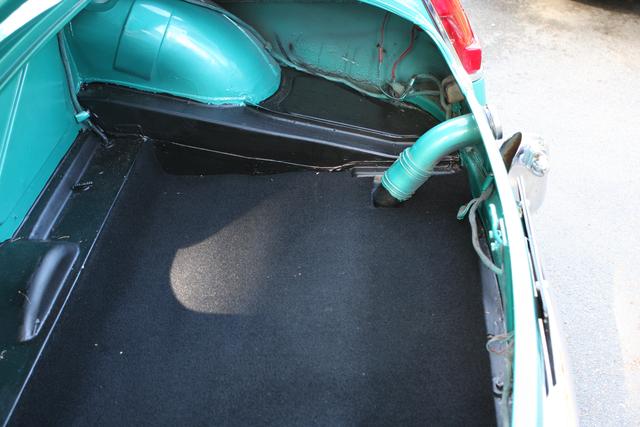
After welding, I opened my can of special rustproofing primer and painted the trunk, partly to remove the vestiges of original yellow, but also because I wanted the trunk floor to be black.


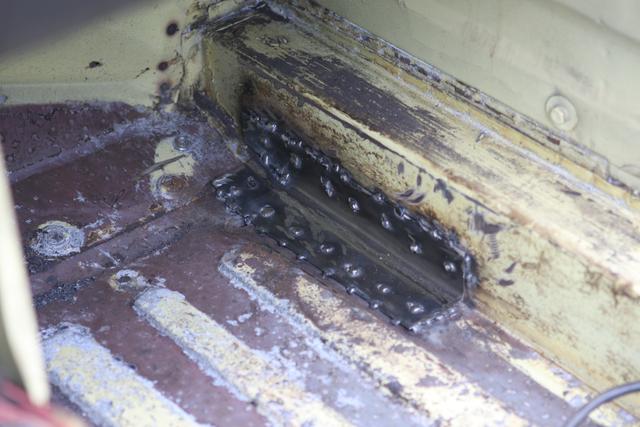

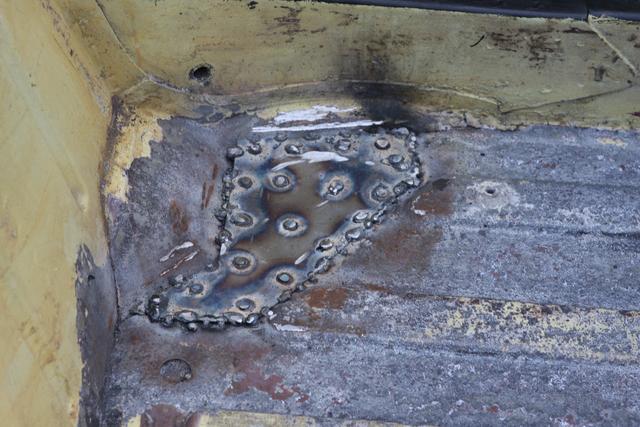
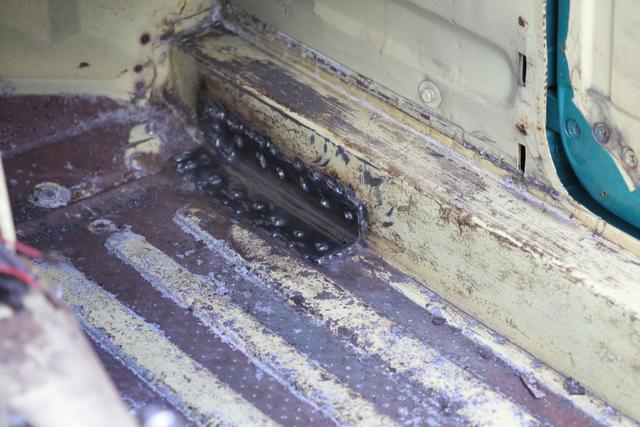
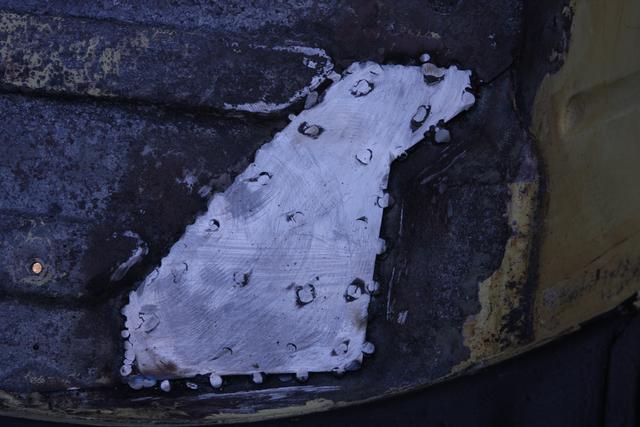
Before I tackled the driver's floor, I needed to address the ugly welds I had already done. It was time to grind the welds down to where they would be smooth. I started with a cutoff disk, which was OK but did gouge the metal. Then I tried the grinder disk, which worked OK but took a very long time. Finally I tried some sanding disks - first a 150 grit before eventually settling on the 24 grit disk, which did the job to perfection!
In preparation for the floor pan weld to come, I carefully marked the position of the seat mounting bolt, then drilled the hole and welded the seat mounting bolt to the underside of the floor pan.
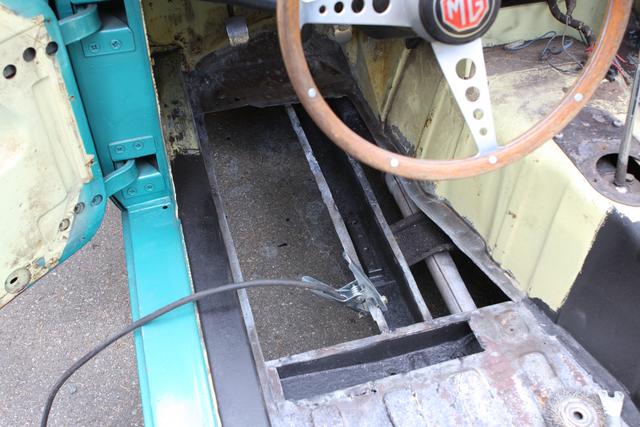
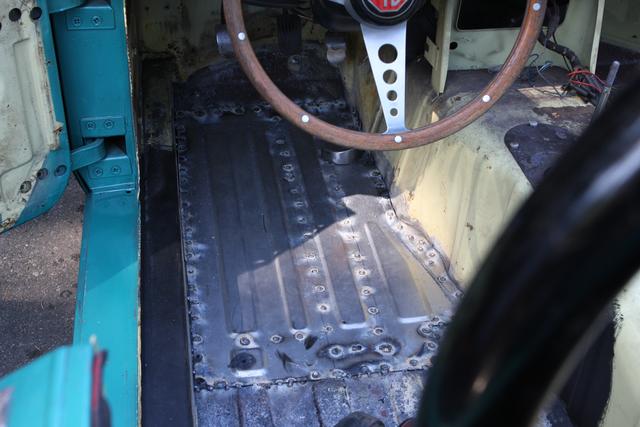
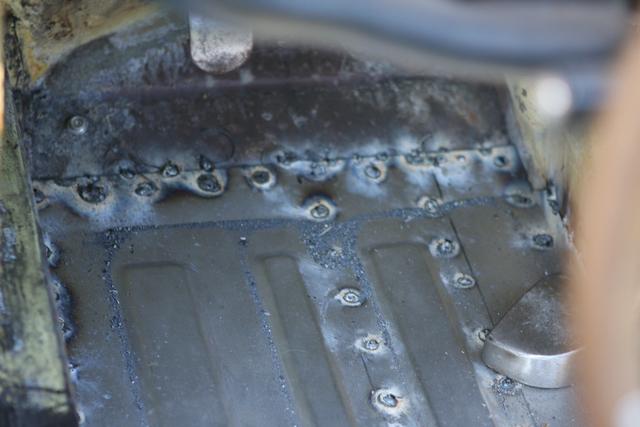
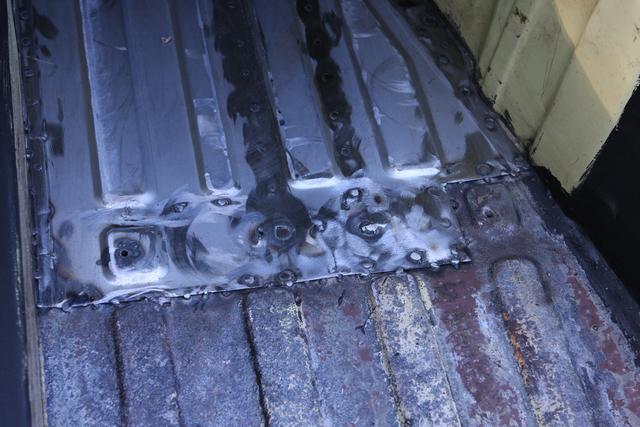
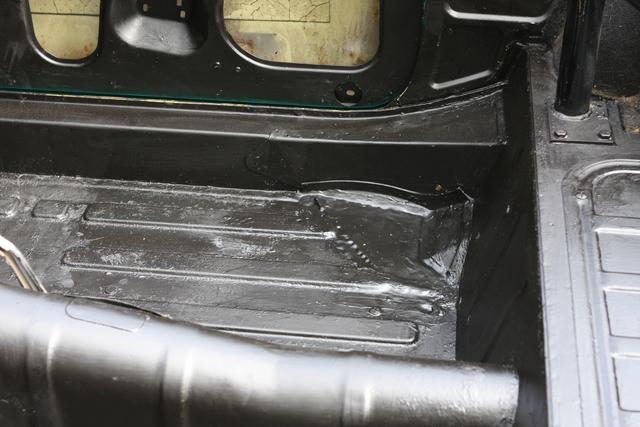
Now I was ready to tackle the major weld - the driver's panel. I marked my holes carefully, then drilled them as before with my drill press. Then I fitted the floor pan, and began to weld. By now I was comfortable with my welds, and work proceeded quickly. I started at the rear and moved forward. From time to time I needed to place a weight on the panel and hold it down prior to welding in order to achieve a good fit. The last to be welded was the outer side portion of the panel, and it wasn't totally flat due to some heat distortion. Good thing I have "seam sealer!".
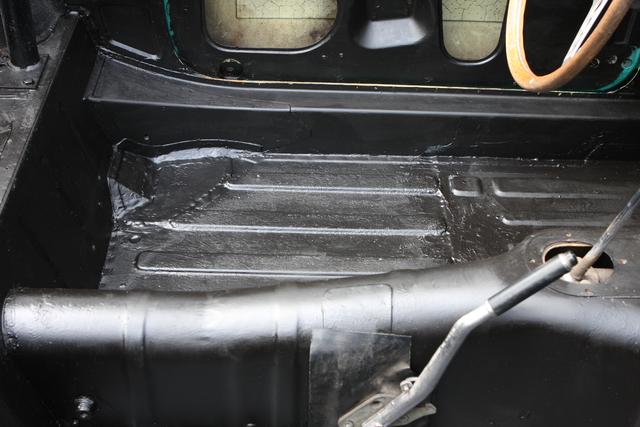
After the driver's floor panel was welded in place, I really went to work with the 24 grit and the angle grinder, taking all welds down until they were nice and flush.
I finished the day by using up my initial small can of black primer painting the rear portion of the floor as well as the rear deck and the inside of both doors.

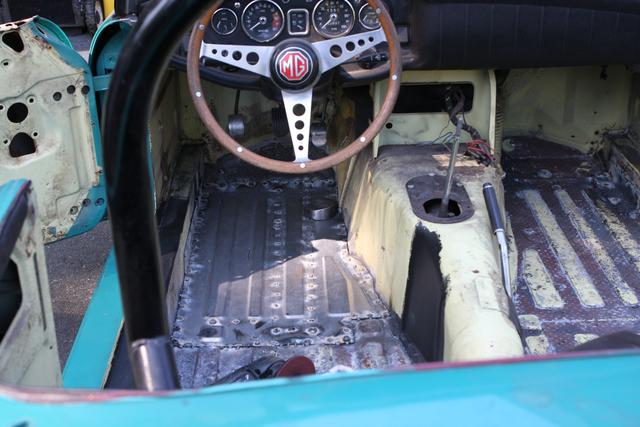
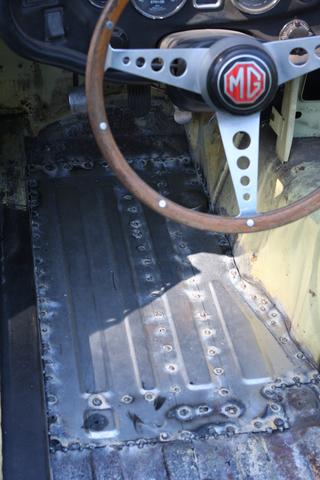


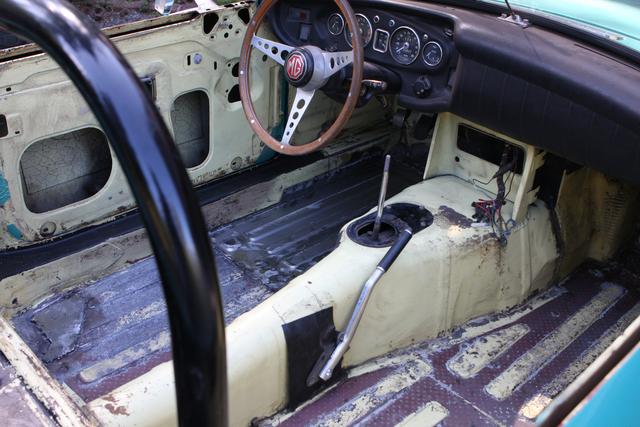
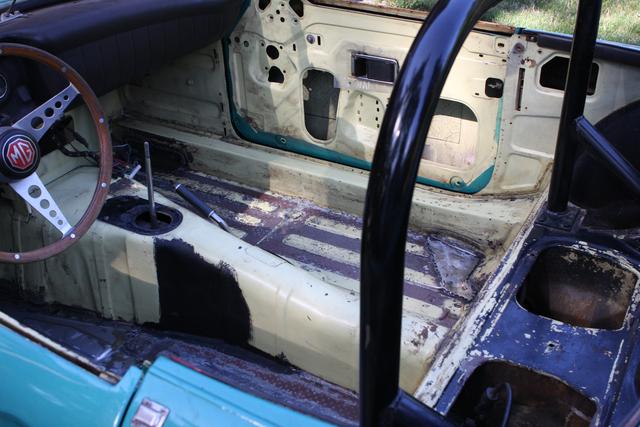
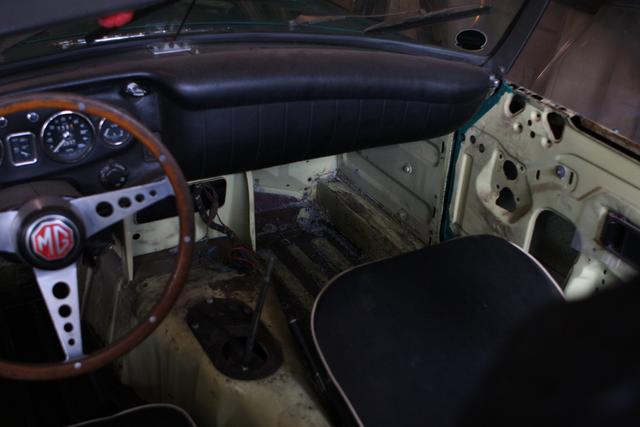
With the welds complete, I opened the large can of primer and refilled my small can. I started by touching up my paint job from the previous day's painting, then continued to paint the entire floor, transmission hump and yellow areas in the front of the car. I paid special attention to the welds, ensuring that plenty of primer was applied to the edges of the welds. I also painting the rear battery cover. I then finished by washing the car exterior to remove any dust and dirt.
After allowing a few days for the primer to cure, the next step will be the seam sealer.


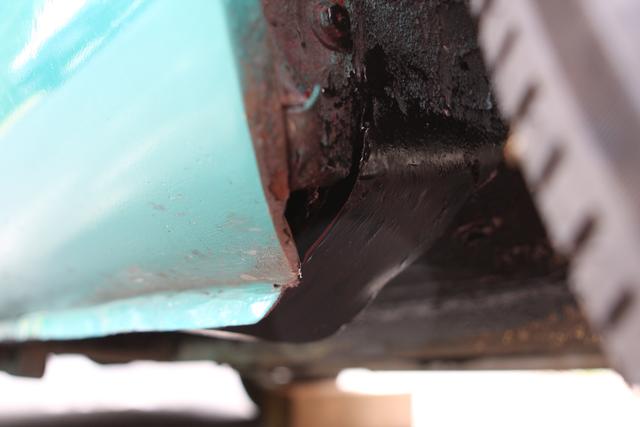
Once everything was primed, I opened the can of seam sealer and began to seal the seams. The can said "can be painted with a stiff brush", but this was only a fantasy. In practice, it took the combined efforts of a putty knife and my fingers to get the seam sealer placed and smoothed to my satisfaction.
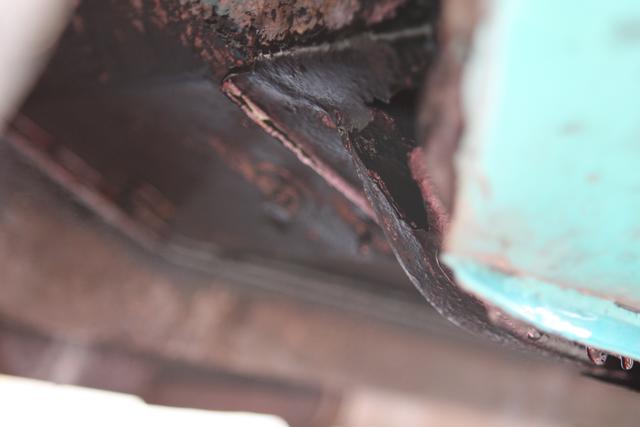
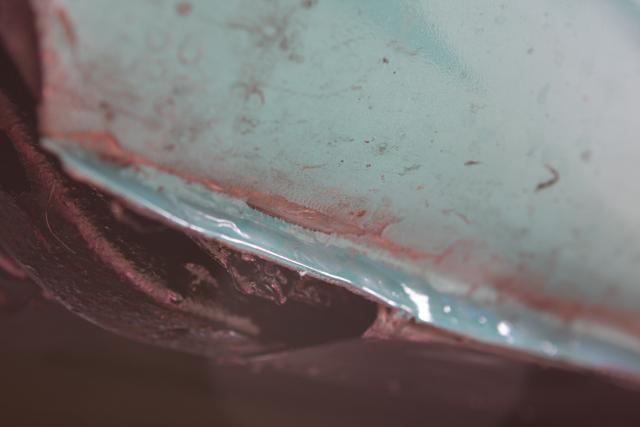
All seams were sealed, including those underneath the panels. Before sealing, I used rust-mort on the outer frame, then primed everything. The seam sealing went OK, except that while I had ground the joints before welding, I had done it from above, leaving some rather sharp edges on the underside. Now I was finding all those sharp edges as I installed the seam sealer. It's no fun to have bleeing cuts on one's fingertips totally covered by hardening sealer! Fortunately, some first-aide resolved the situation and the seams were complete and painted.


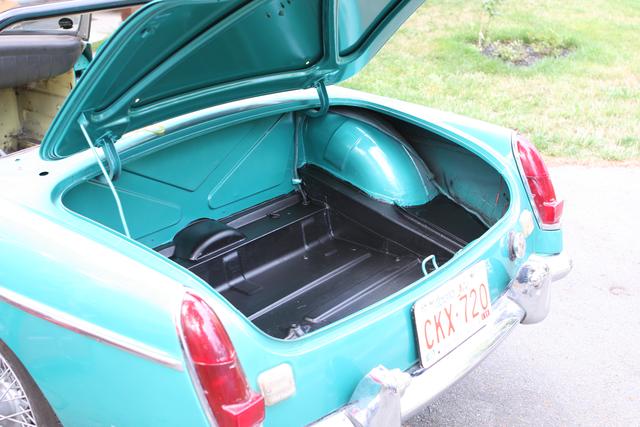
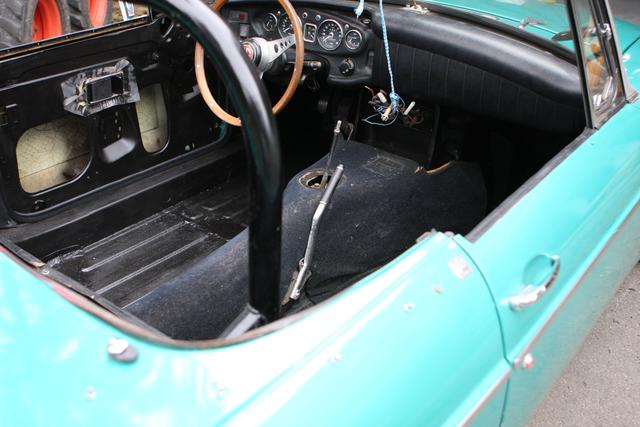
Now that the panels were done, time to begin putting the car back together. I started with the rear panels, then the rear deck, battery box and battery cover, followed by the transmission tunnel.
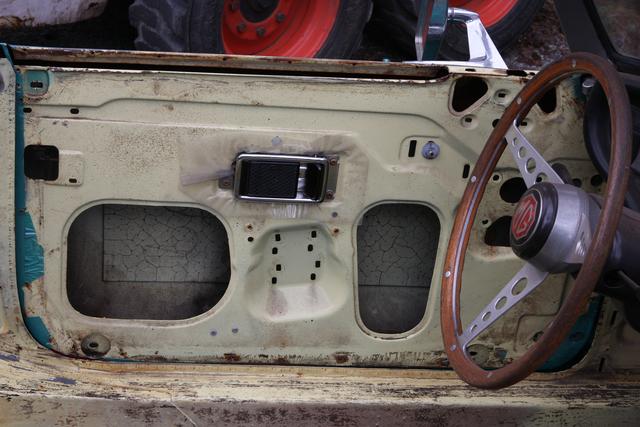
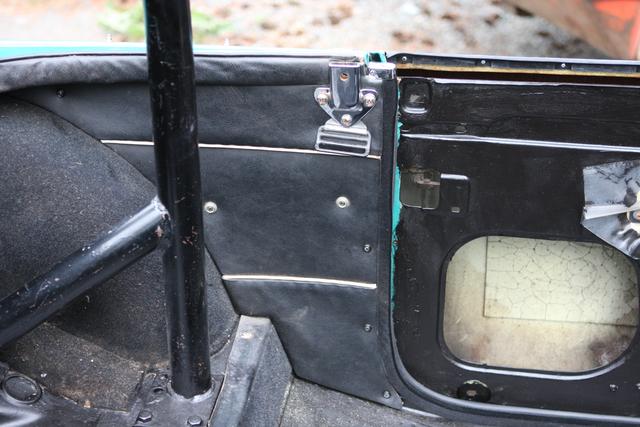
Next came the two doors. This was a larger task as the side lights had to be installed with new rubbers. This was a bit of a task, as the various bolts had to be 'persuated' to engage at times. Eventually the side ligts (vent windows and front channel) were installed. The door windows were next. This was a fiddly procedure where the rear channel was installed, then the window carefully lowered into place, then raised and lowered by hand to ensure the channels were correctly placed. Then the window was pinned in the up position as the window crank was inserted, then engaged with the window bottom track, then moved into position and the bolts installed. It took some time, but was eventually done to satisfaction.
The door cover panels were installed, then the door trim panels, complete with a zillion (or so it seemed) screws each to fasten the panels in place. Then the door closing handle and the door opener bezel. This is a two-part plastic component that did not age well - the passenger side snapped when trying to fit it.
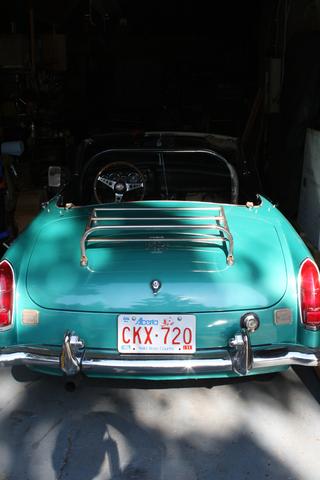
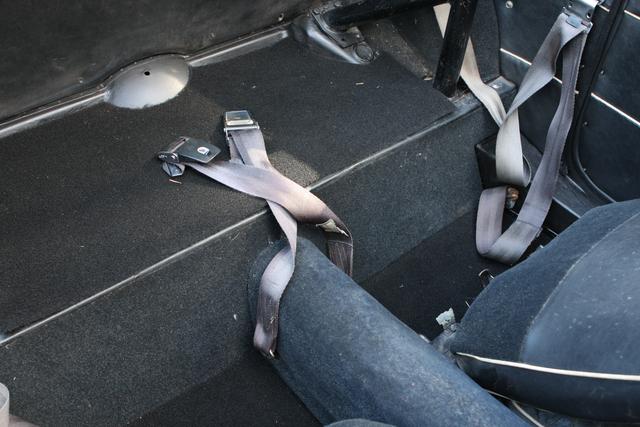
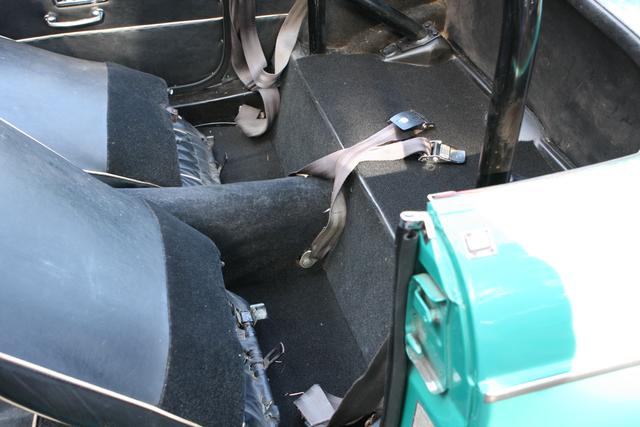
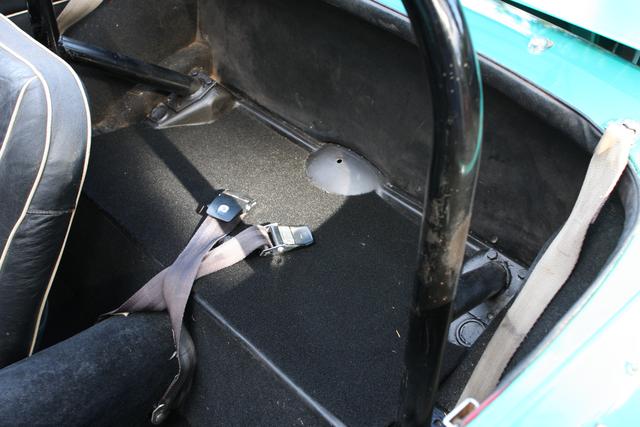
Eventually most of the panels were placed leaving bits and pieces - the luggage rack, seatbelts, rear rubber mats (made from rubber carpet runner).
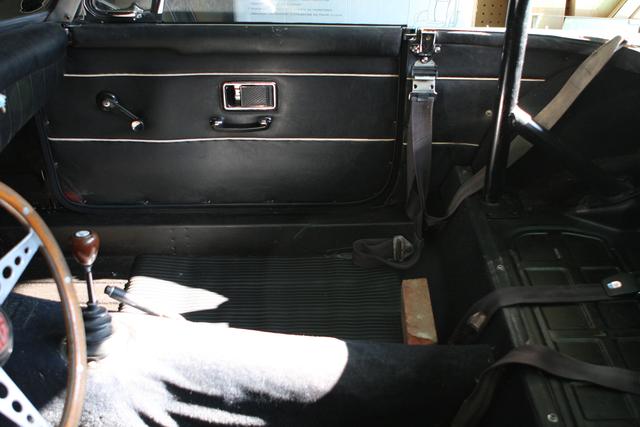
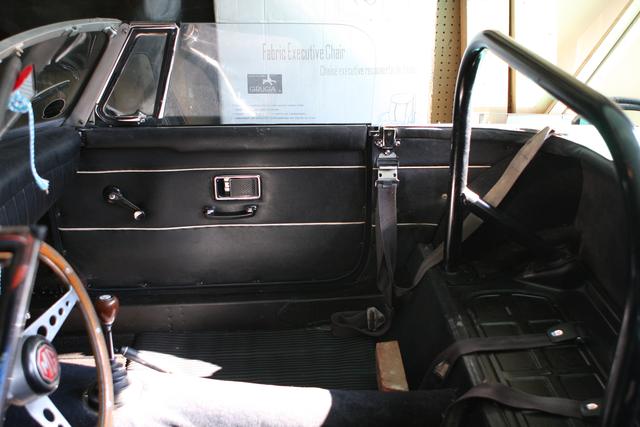
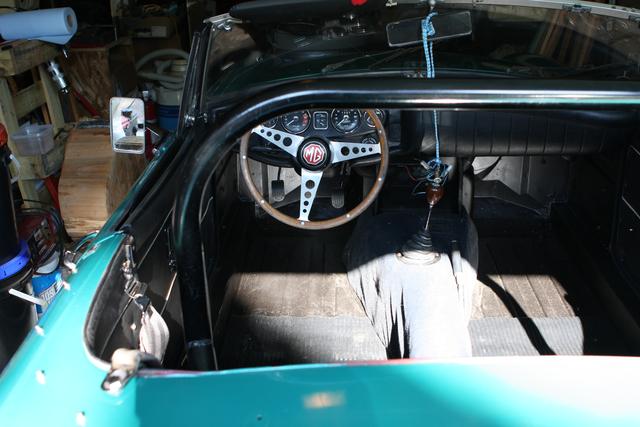

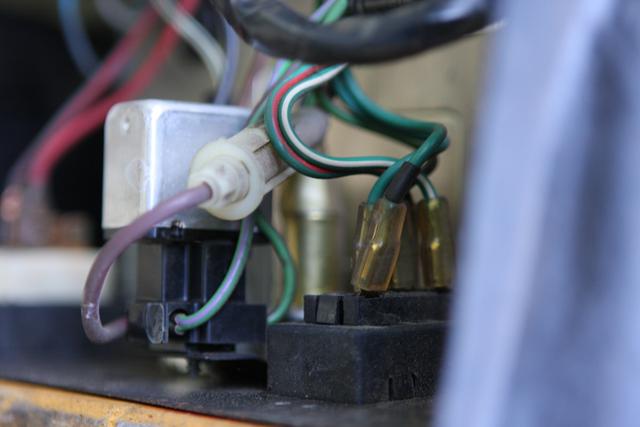
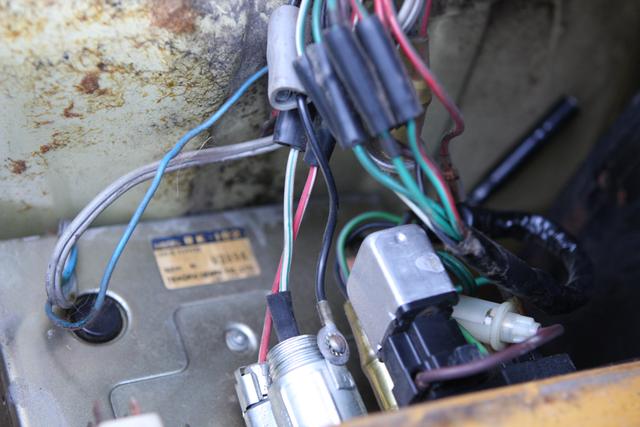
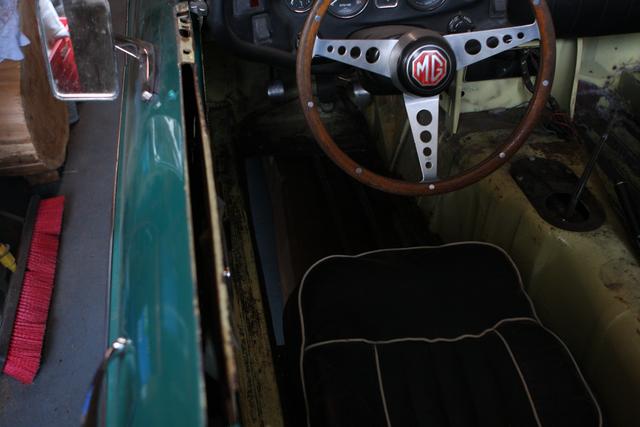
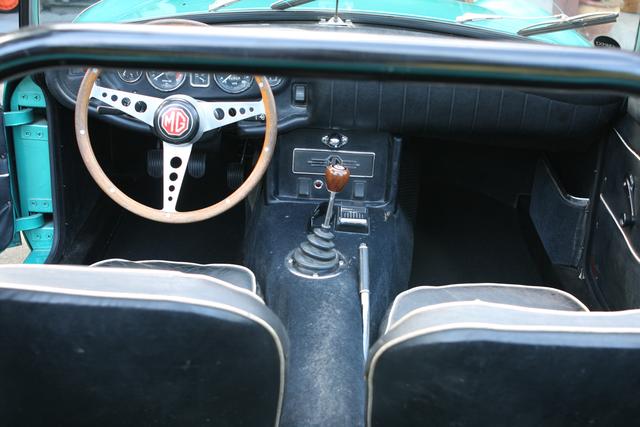
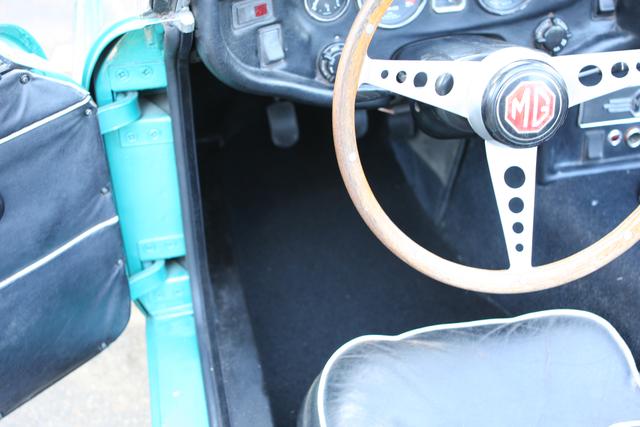
Holes were made in the rubber mats to allow for seat bolts, then the seats were installed - a cumbersome and tedious process. After much trial and error getting the runners to position correctly, the seats were bolted in place. Shifter knob re-installed, ashtray and new heater switch were also done. The latter was a chore as the captured switch was virtually impossible to remove. So instead I swapped the "guts" of the switch, and all was well. Then some new rubber pedal covers and things were looking good.
The car was now ready for a test drive. As always, it fired up quickly and well, though the idle needs some adjustment when cold. After a warm-up period, I tested the clutch and then proceeded to drive around the block a few times. After the drive, I opened the hood and did an inspection, finding a small pin-hole leak in the radiator. Also, the turn signals did not work. At first I feared the switch, but then remembered the transmission tunnel console has not been installed yet, and it contains the turn clicker, so of course no signals.
After supper, Linda and I went for a proper test drive to Blue Herron park to see the ocean, which is a nice twisty 6 km ride. There and back with no new issues.
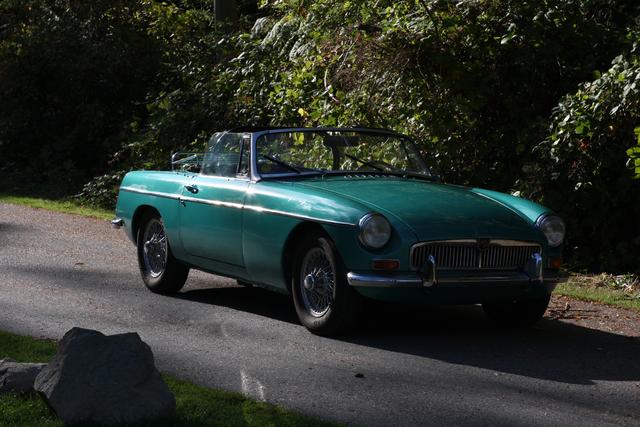
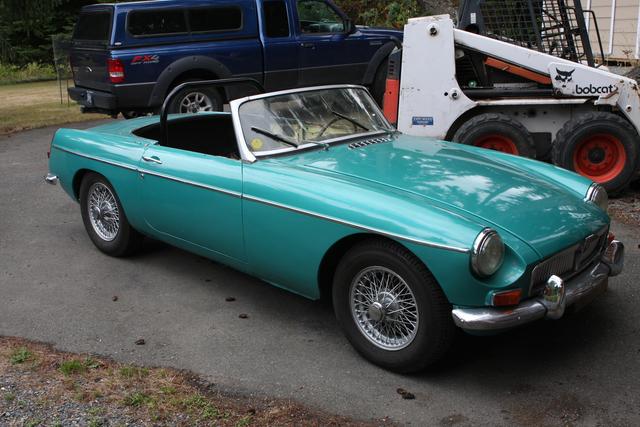
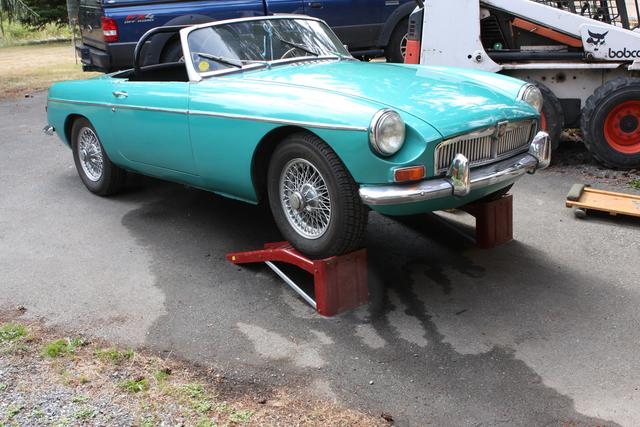
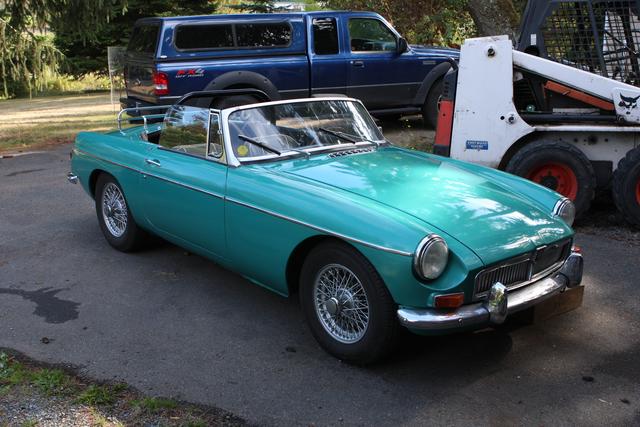
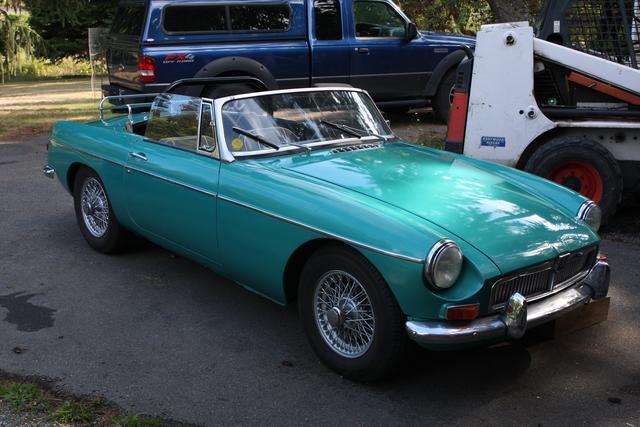
The car is almost done, and looks quite prim an proper as it sits in the driveway after our jaunt!

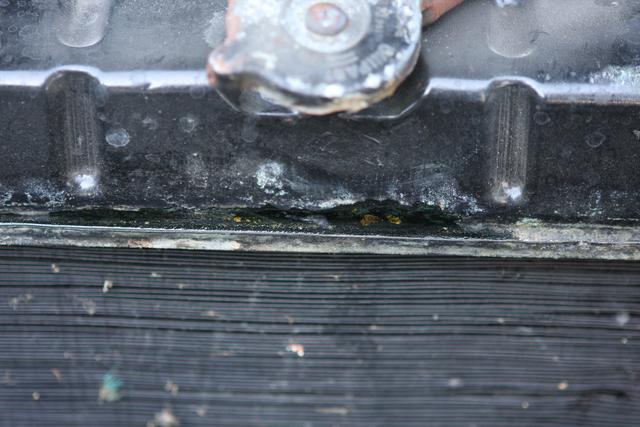
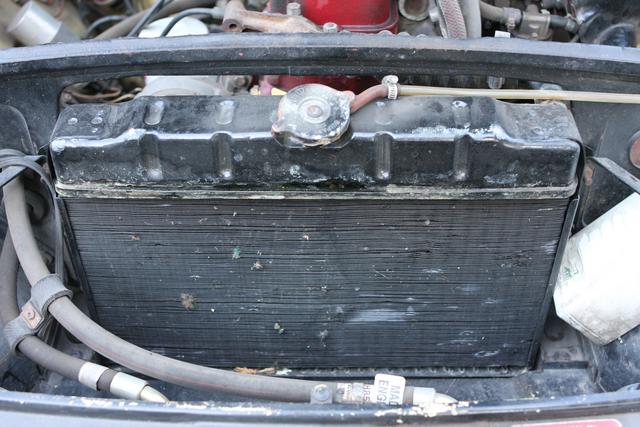
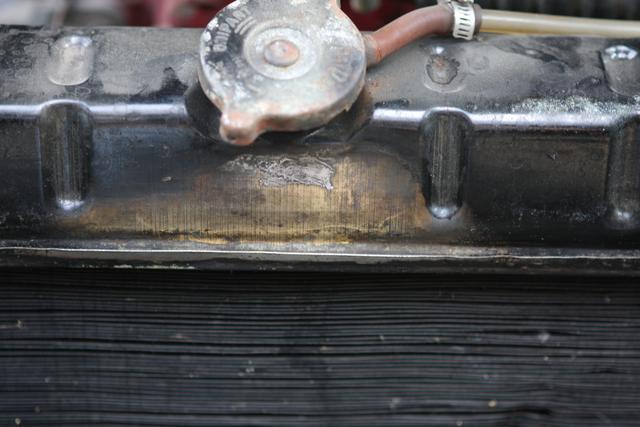
The Aug 31 test drive indicated what appeared to be a pinhole leak in the radiator. Borrowing a rad pressure tester from Bill, I could clearly see the small leak. I figured that I could solder a pinhole leak myself, so I went about cleaning up the radiator area in preparation for soldering. Unfortunately, cleanup showed not a pinhole, but a 4" crack in the tank below the filler cap, which appears to be a stress crack in the tank. After cleanup, pressure tesing showed the radiator to be leaking along the entire crack, as well as a leak at the rear of the tank where a tube enters.
After about 5 minutes thinking, I called 'usedmgbparts.com' to see what radiators he had. Good thing as it turns out radiator repairs have gotten rather costly since 1995! Fortunately Eric had 3 radiators available, from 'used, removed from a working car' to 'inspected and tested by a rad shop' to 're-cored'. The cheapest was the 'used...' and it also looked the best (weird) so I took it. It does not take too long to replace the radiator in an MGB, and soon I was fiddling with the hose clamps trying to get the cooling system with new radiator to hold pressure. After some adjusting, this was achieved, and with a new radiator cap, the system passed warm-up and driving tests with ease.
Also during the first week of September, I replaced fan switch and repaired the radio fascia and installed it. I also obtained a proper seatbelt washer from 'usedmgbparts.com' when I picked up the used radiator, and installed that. I also managed to install the cup washers holding the rear top fasteners. Having received an order from Octagon that included more panel screws, I also finished installing all the panels on the car.
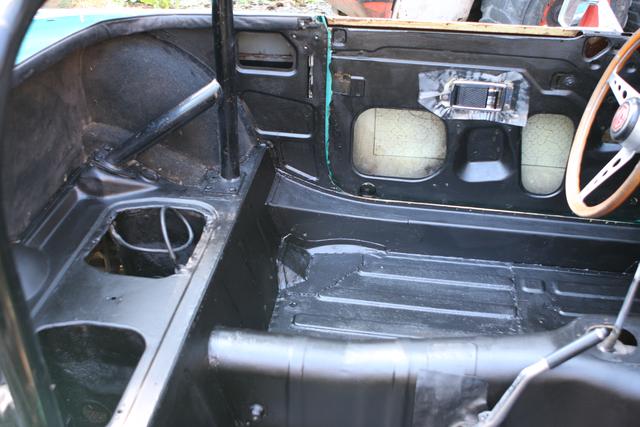
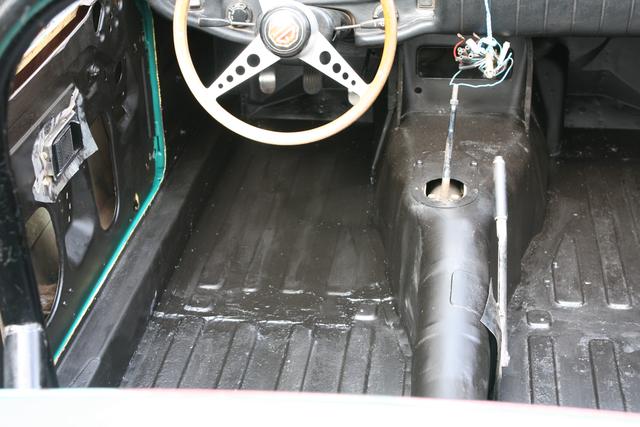
One last push to complete the restoration. Today I played hookey and worked on the carpets and final finish.
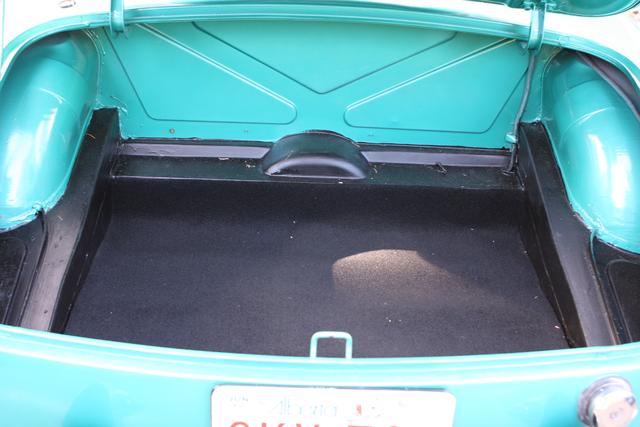
First, using cardboard I made tamplates for the front carpets, rear deck carpet and trunk carpet. Then, using the templates I marked the carpet and cut it out. Finally, I installed the carpets. Once done, they sure looked good!
I tried to stretch the tonneau top to it's original fasteners, but it's just too old, and started to tear instead of stretch. For now I think I'll just go without a top.
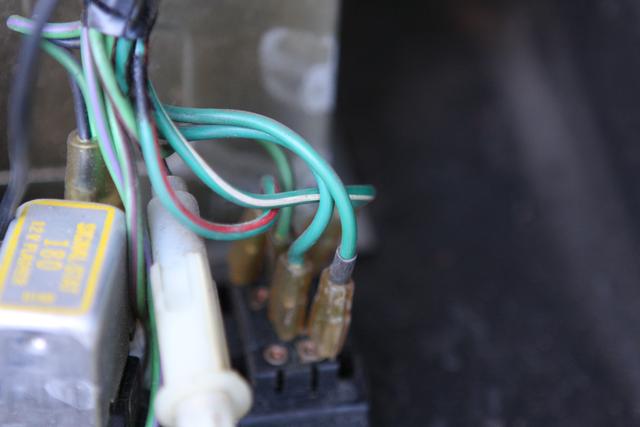
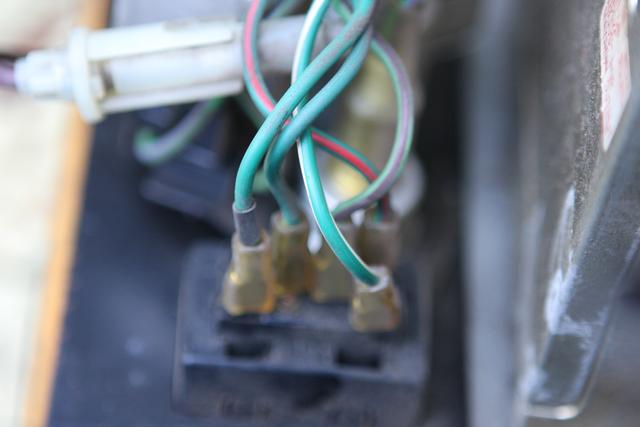
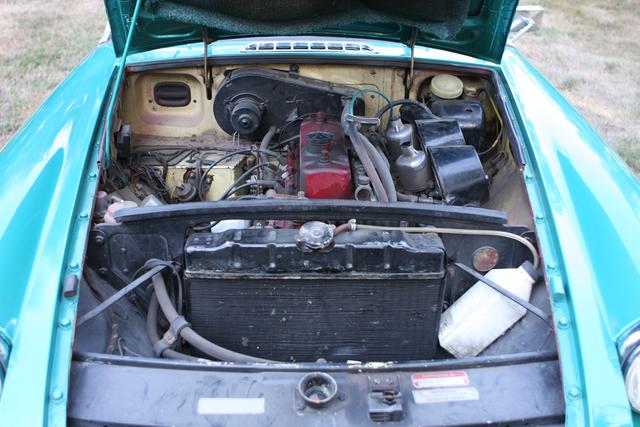
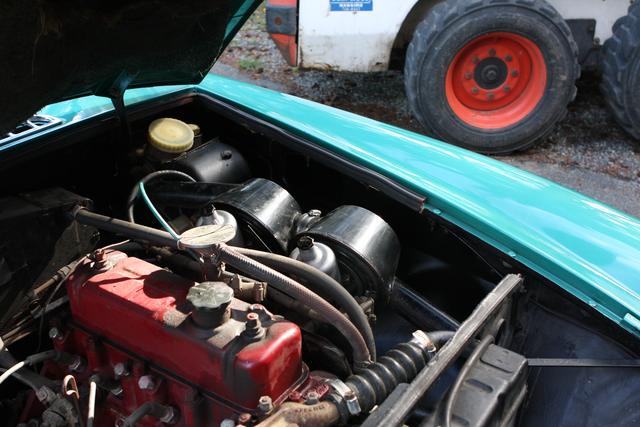
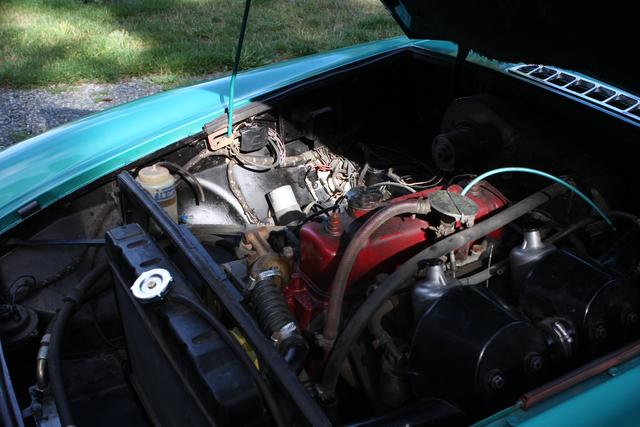
After an inspection of the engine compartment while changing the radiator and removing the old windshield wiper pump, I came to the conclusion that I really had to treat the starting rust (especially in the inner cavities) by painting the engine compartment with the special rust primer paint. As I did not want to remove all the various wiring harnesses (probably with pretty siezed bolts), I painted the engine compartment as best I could with everything in place. It really does not look too bad, and does the job - preventing rust where needed.
Finally, I waxed the entire exterior and buffed it to a nice high gloss shine.
After this, we headed out for a drive to the beach, stopping at the Wheatsheaf on the 'scenic route' home for some celebratory refreshments
(Addendum - Sept 11, 2009)... While out on a drive today we picked up some spiffy leather conditioner and cleaner from a tack shop. I used it to clean up and condition the leather seats, and it also did a great job cleaning up all the interior panels and the dash.THE RESTORATION IS COMPLETE!


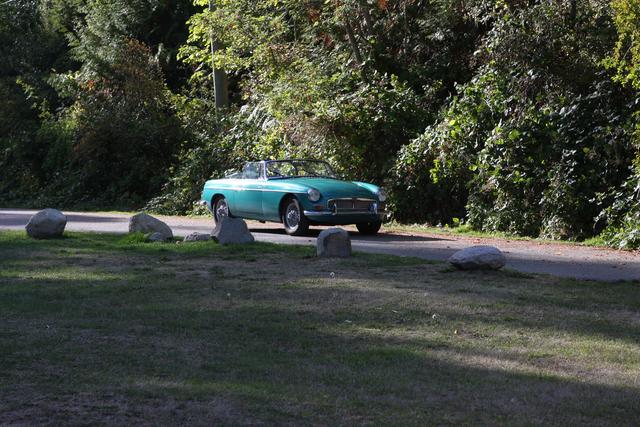
An outing to Blue Herron Park on Yellowpoint Road, near home.